
Review a supplier account statement
Open Statement. Select Company / account currency and set From and To dates. Keep companies and currencies separate when reconciling balances.
Before you start
Use your authorized ERP account and the correct company. These screenshots use fictional staging records. Replace the example quantities, dates, warehouses and values with your approved business information. Submission affects the relevant workflow or stock ledger; review the draft first.
Addresses used in this tutorial
ERP_URL is your organization’s ERP address. ACADEMY_URL is the Academy base address: staging uses https://erpstaging.nexcommand.ai/academy; production uses https://academy.nexcommand.ai. Saved record IDs and temporary draft IDs differ between installations. Course IDs and element IDs in the example are not portable to another installation.
Supplier Portal address and preview
SUPPLIER_URL is your organization’s supplier portal. Production uses https://supplier.nexcommand.ai directly; these staging screenshots use https://erpstaging.nexcommand.ai/supplier. The screenshots are labelled staff preview and contain synthetic suppliers. Preview does not grant supplier access, and category saving is disabled. Use an approved supplier account for your own records.
Step-by-step instructions
Select account currency and dates
Open Statement. Select Company / account currency and set From and To dates. Keep companies and currencies separate when reconciling balances.
- Example / selection
- NexCommand AI LLC / USD; January 1 to October 13, 2026
- Expected result
- The reporting scope is explicit.
{SUPPLIER_URL}/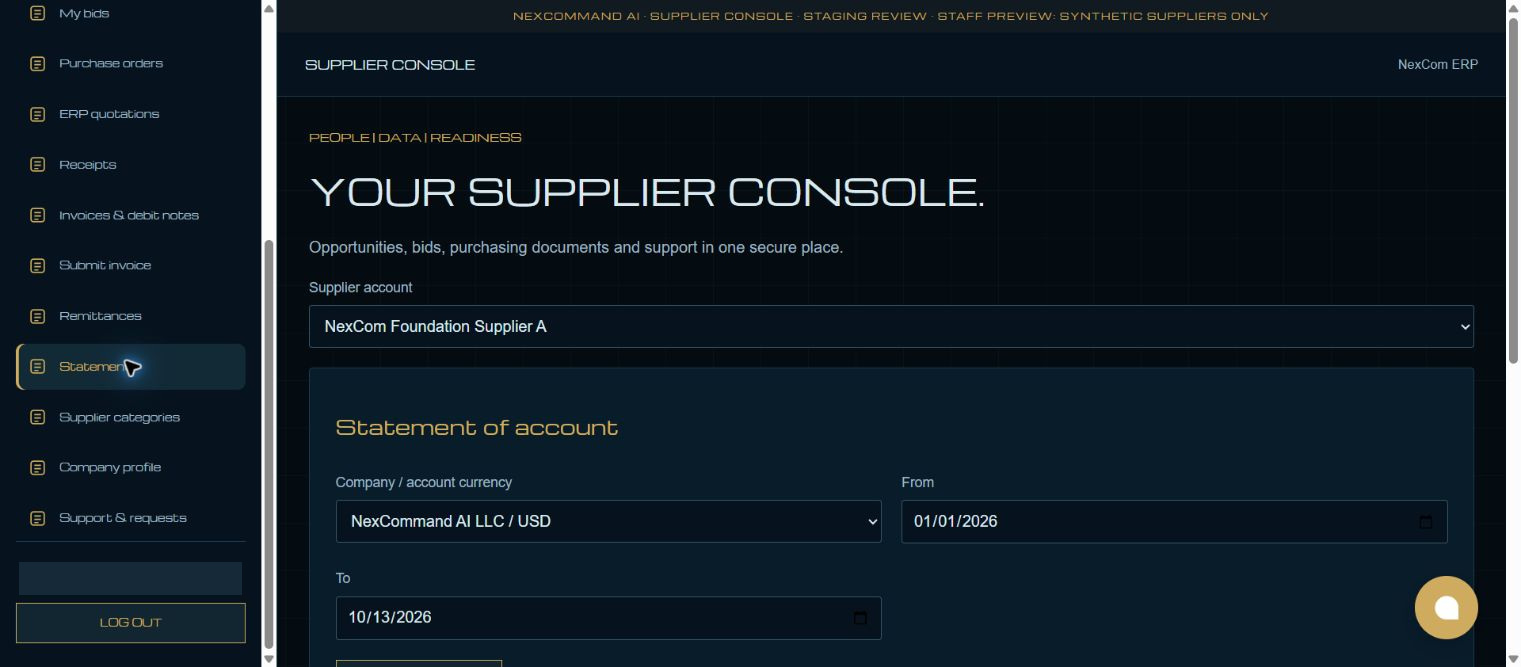
Generate and reconcile
Choose View Statement. Compare opening balance, voucher debits and credits, running balance and closing balance to your records. This payable statement calculates credit minus debit and excludes cancelled entries.
- Example / selection
- Opening USD 0; closing USD 165
- Expected result
- Posted payable entries are shown.
{SUPPLIER_URL}/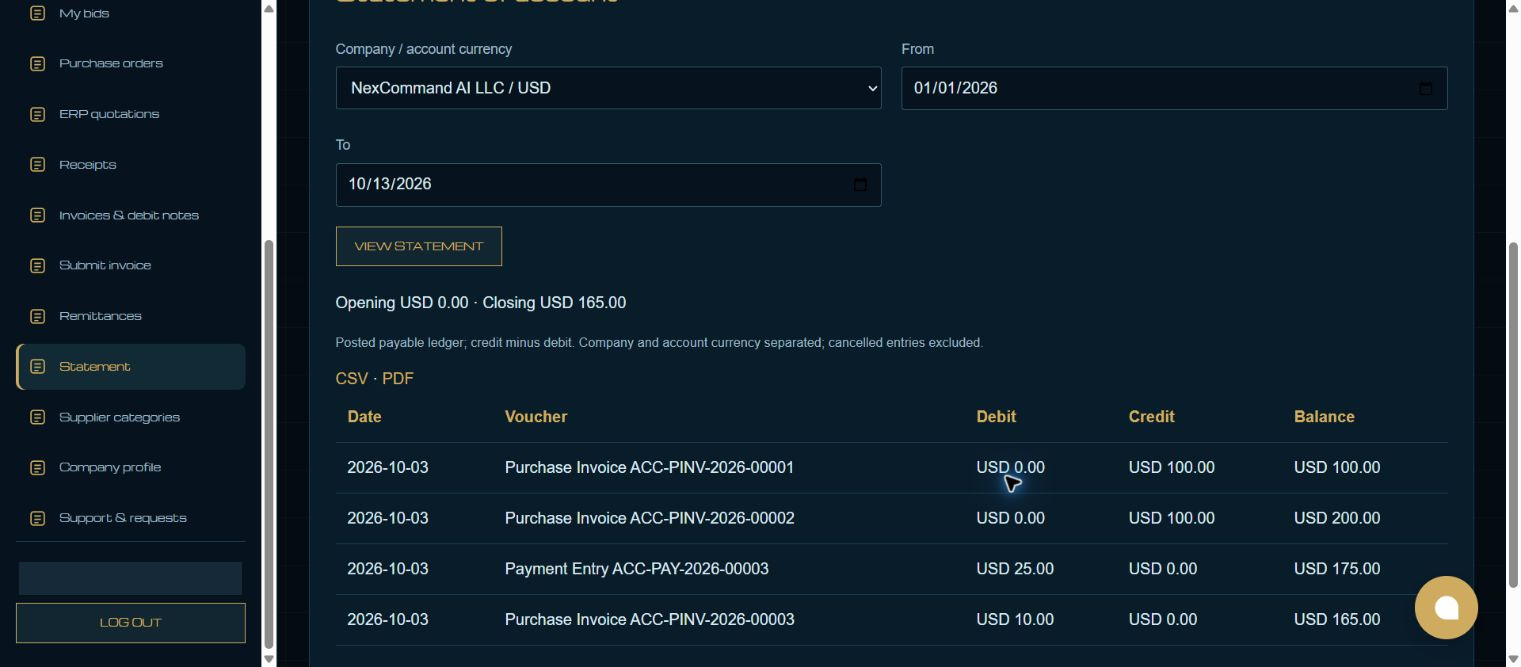
Export or request clarification
Use CSV or PDF when you need an account copy. Record the affected voucher reference and raise an Invoice inquiry in Support if an entry needs clarification. Viewing a statement does not make a payment.
- Example / selection
- Purchase Invoice and Payment Entry references
- Expected result
- The statement can support reconciliation.
{SUPPLIER_URL}/Verified result
The statement was generated and reviewed in synthetic staff preview. Opening, closing and voucher rows were verified. Export controls were inspected; exported files were not downloaded in this walkthrough.
Troubleshooting
Wait for Link search results and choose the exact record. Leave each edited field to commit its value. Check required dates in every item row. A saved draft and a submitted record are different states. If validation fails, correct the highlighted field and verify the saved result before continuing.