
Choose supplier categories through the hierarchy
Open Supplier categories. Choose the broad Category, wait for Segment to load, then select the relevant segment. Changing a parent resets dependent choices.
Before you start
Use your authorized ERP account and the correct company. These screenshots use fictional staging records. Replace the example quantities, dates, warehouses and values with your approved business information. Submission affects the relevant workflow or stock ledger; review the draft first.
Addresses used in this tutorial
ERP_URL is your organization’s ERP address. ACADEMY_URL is the Academy base address: staging uses https://erpstaging.nexcommand.ai/academy; production uses https://academy.nexcommand.ai. Saved record IDs and temporary draft IDs differ between installations. Course IDs and element IDs in the example are not portable to another installation.
Supplier Portal address and preview
SUPPLIER_URL is your organization’s supplier portal. Production uses https://supplier.nexcommand.ai directly; these staging screenshots use https://erpstaging.nexcommand.ai/supplier. The screenshots are labelled staff preview and contain synthetic suppliers. Preview does not grant supplier access, and category saving is disabled. Use an approved supplier account for your own records.
Step-by-step instructions
Choose category and segment
Open Supplier categories. Choose the broad Category, wait for Segment to load, then select the relevant segment. Changing a parent resets dependent choices.
- Example / selection
- C — Components & Supplies; 31000000 — Manufacturing Components and Supplies
- Expected result
- Only the selected branch is available.
{SUPPLIER_URL}/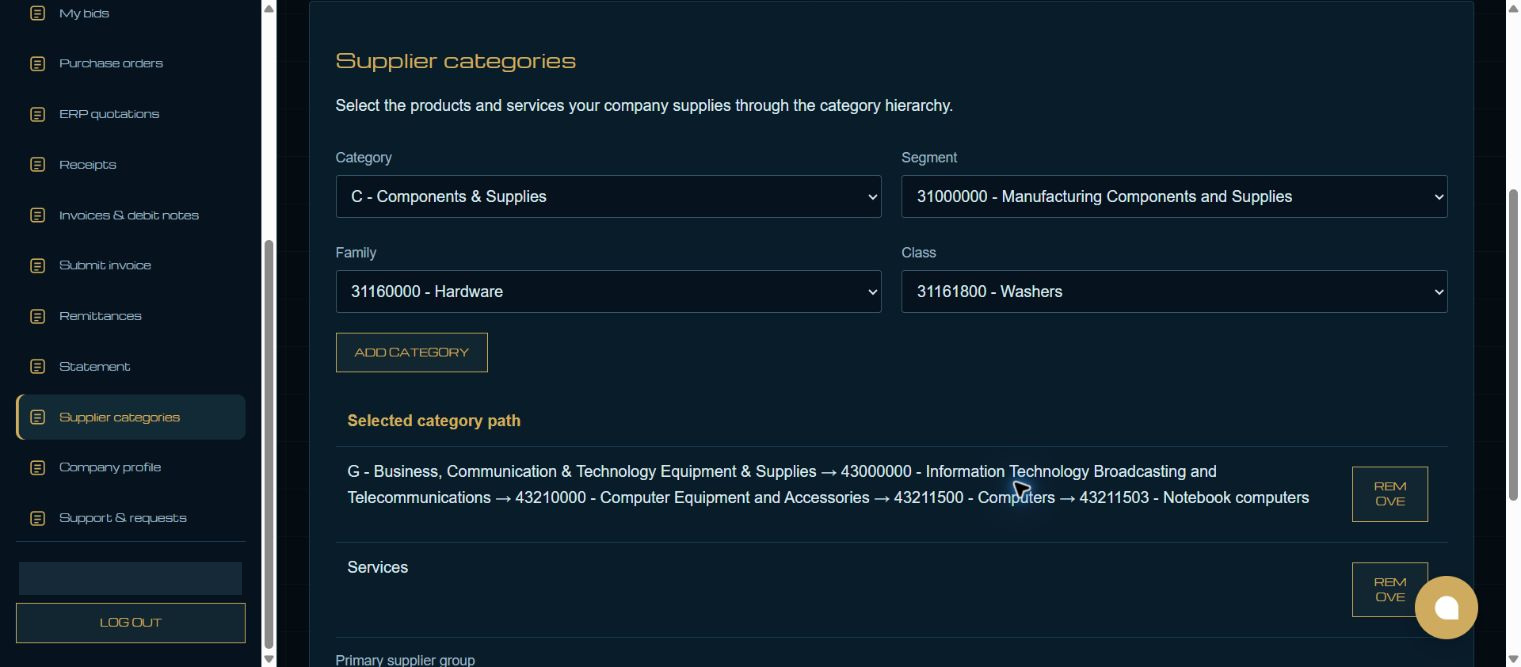
Choose family and class
Select Family and Class. Continue to Commodity if the imported branch provides that level. Choose categories that describe your actual supply capability.
- Example / selection
- 31160000 — Hardware; 31161800 — Washers
- Expected result
- The chosen path describes the supplied product.
{SUPPLIER_URL}/Add and review the path
Choose Add Category. Review the path in Selected category path before adding another category. An added path still requires Save Categories in an authorized supplier session. Staff preview selections are temporary and its save control is disabled.
- Example / selection
- Washer path added temporarily in preview
- Expected result
- The selected path appears in the list.
{SUPPLIER_URL}/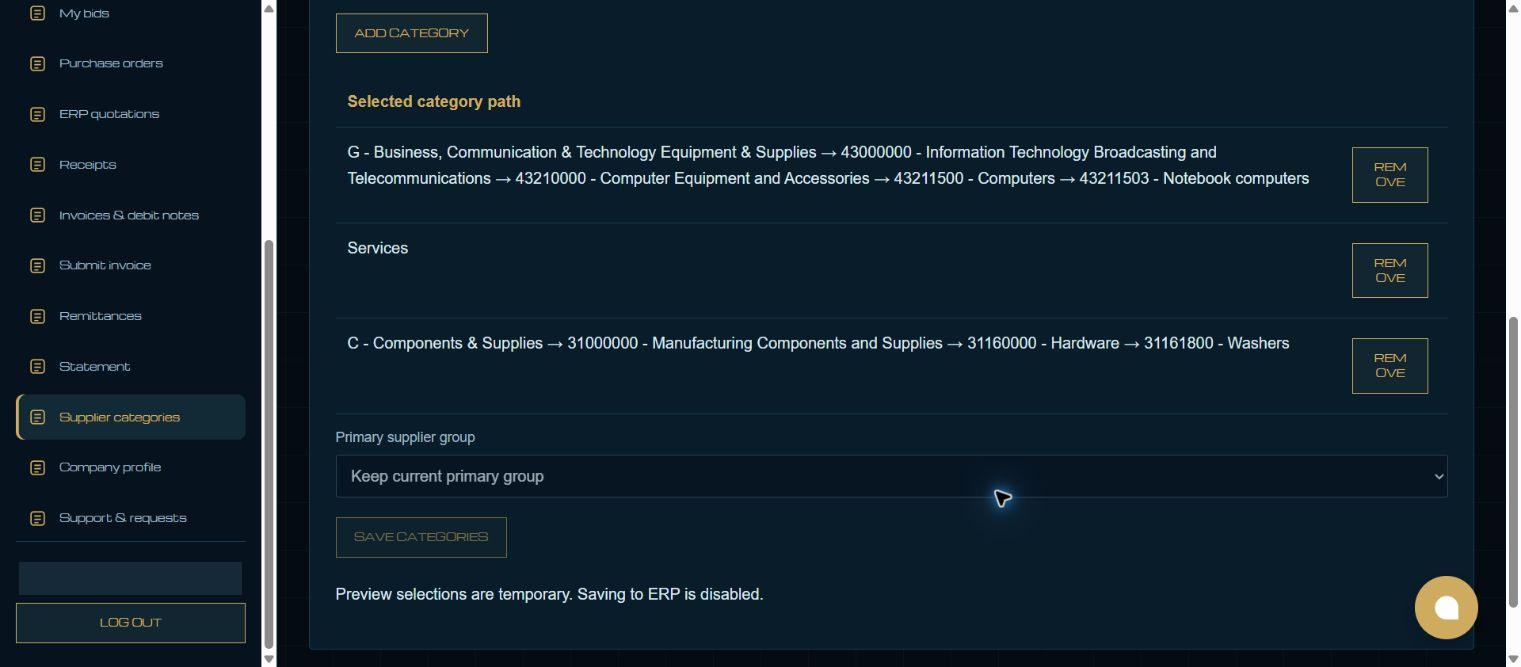
Verified result
The chained dropdowns and temporary Add Category action worked in staff preview. No supplier master was changed. Persistence through an approved supplier session remains to be verified separately.
Troubleshooting
Wait for Link search results and choose the exact record. Leave each edited field to commit its value. Check required dates in every item row. A saved draft and a submitted record are different states. If validation fails, correct the highlighted field and verify the saved result before continuing.