
Register a serial number and inspect its ledger
Open Supply Chain → Serials & Batches → Serial No. Search for the identifier before choosing Add Serial No.
Before you start
Use your authorized ERP account and the correct company. These screenshots use fictional staging records. Replace the example quantities, dates, warehouses and values with your approved business information. Submission affects the relevant workflow or stock ledger; review the draft first.
Addresses used in this tutorial
ERP_URL is your organization’s ERP address. ACADEMY_URL is the Academy base address: staging uses https://erpstaging.nexcommand.ai/academy; production uses https://academy.nexcommand.ai. Saved record IDs and temporary draft IDs differ between installations. Course IDs and element IDs in the example are not portable to another installation.
Step-by-step instructions
Review existing serials
Open Supply Chain → Serials & Batches → Serial No. Search for the identifier before choosing Add Serial No.
- Example / selection
- NC-DOCS-SERIAL-002
- Expected result
- Duplicate registration is avoided.
{ERP_URL}/desk/serial-no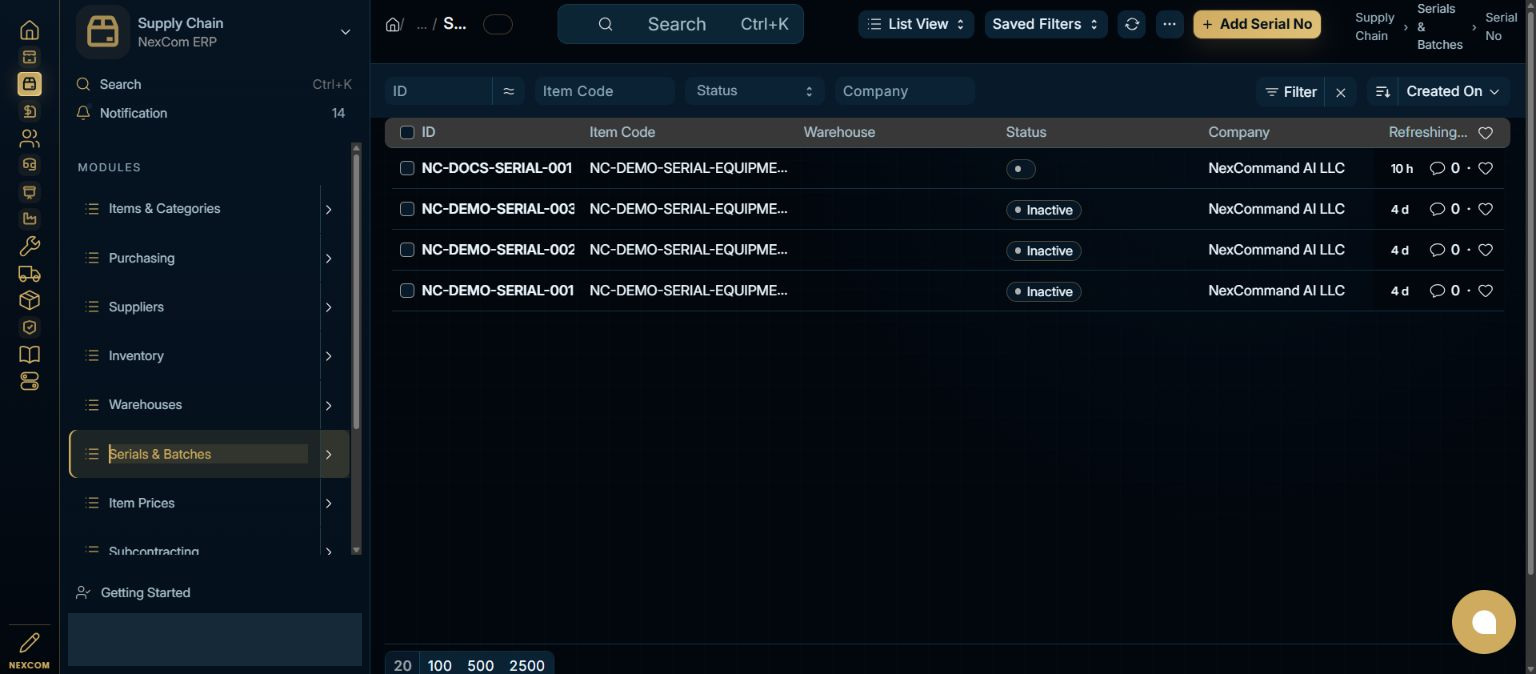
Identify the serialized item
Enter the exact serial identifier and choose an Item configured with Maintain Stock and Has Serial No. Review Company. Set warranty or maintenance expiry only from approved source information. Select the date in the calendar and verify it persists after Save.
- Example / selection
- NC-DEMO-SERIAL-EQUIPMENT; example warranty October 13, 2027
- Expected result
- The serial is associated with its actual item.
{ERP_URL}/desk/serial-no/new-serial-no-{TEMP_ID}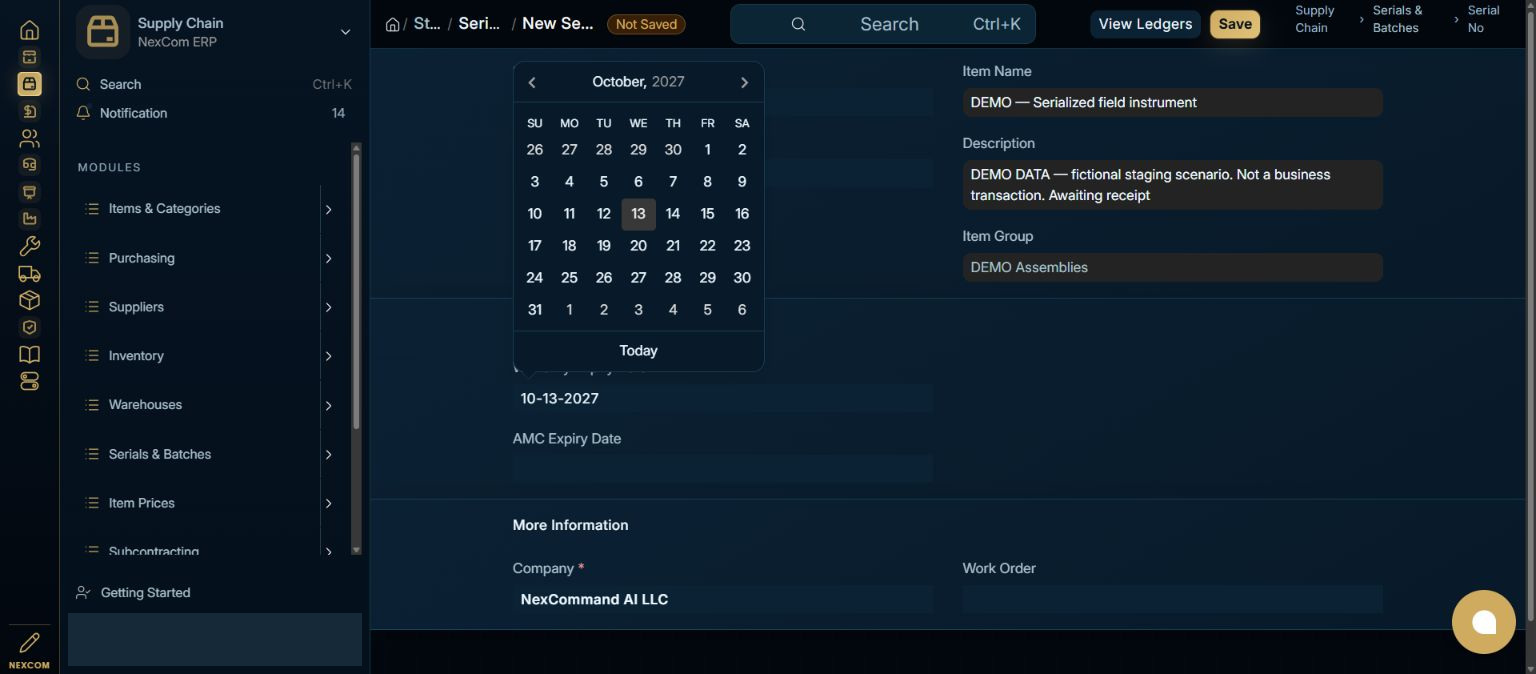
Save and verify
Save and confirm the permanent serial URL. Review item identity and maintenance status. A warranty status is separate from warehouse availability.
- Example / selection
- NC-DOCS-SERIAL-002
- Expected result
- The serial master is registered.
{ERP_URL}/desk/serial-no/{RECORD_ID}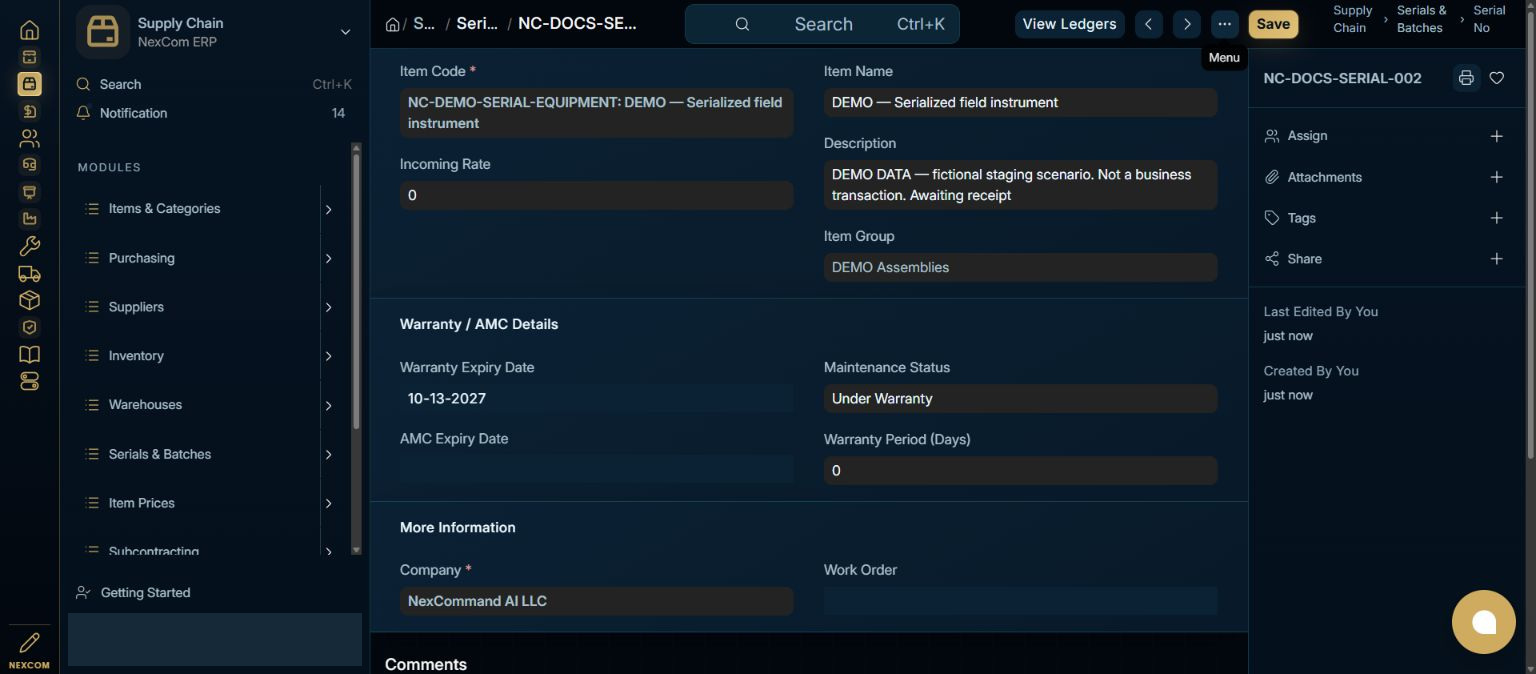
Inspect stock movements
Choose View Ledgers. Check item, serial, warehouse and date/time filters. This newly registered serial shows Nothing to show because no receipt has been posted for it. For an existing received serial, review the linked inward and outward vouchers.
- Example / selection
- New serial; no ledger movements
- Expected result
- Registration alone does not create stock.
{ERP_URL}/desk/query-report/Serial%20No%20Ledger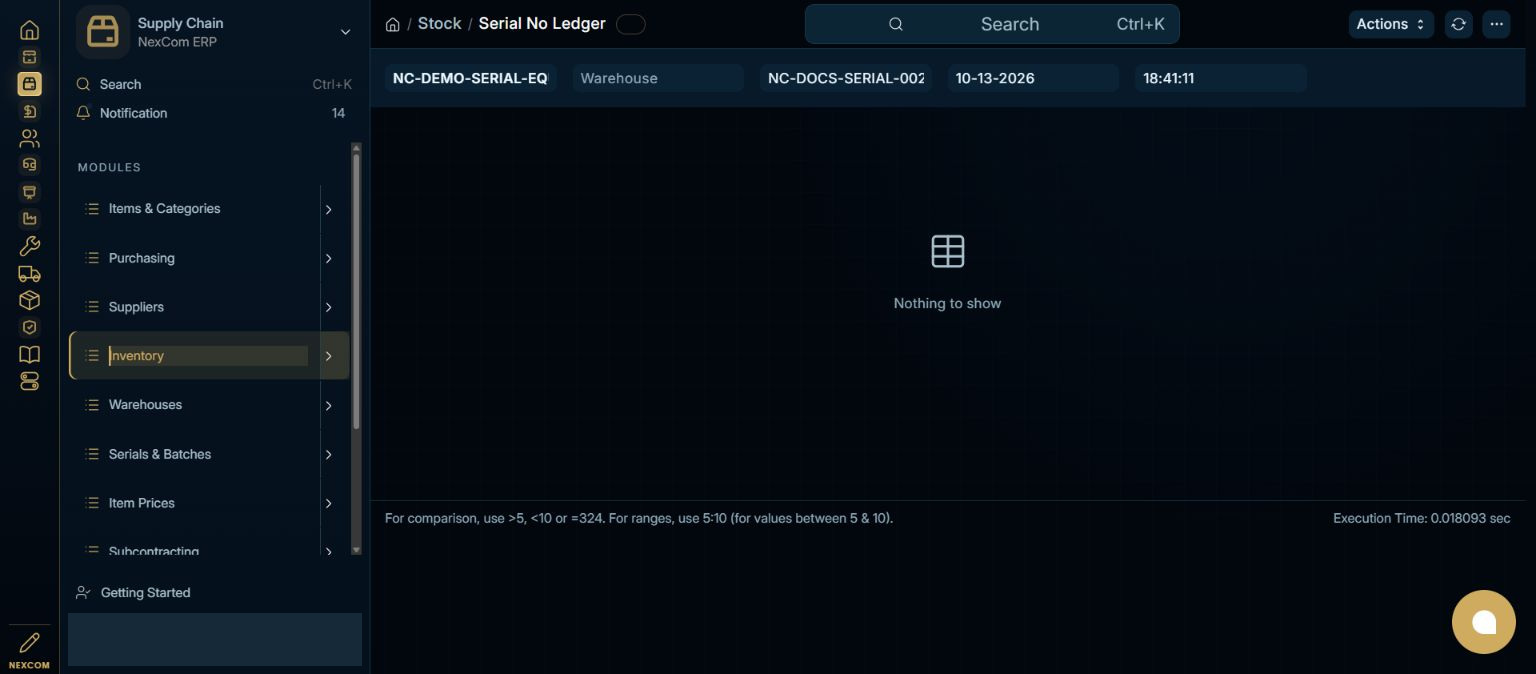
Verified result
The serial master was created in staging and its ledger was opened. The empty ledger was verified. Receipt/bundle transaction and later lifecycle tracing remain separate workflows.
Troubleshooting
Wait for Link search results and choose the exact record. Leave each edited field to commit its value. Check required dates in every item row. A saved draft and a submitted record are different states. If validation fails, correct the highlighted field and verify the saved result before continuing.