
Create a batch and record expiry
Choose Supply Chain → Serials & Batches → Batch.
Before you start
Use your authorized ERP account and the correct company. These screenshots use fictional staging records. Replace the example quantities, dates, warehouses and values with your approved business information. Submission affects the relevant workflow or stock ledger; review the draft first.
Addresses used in this tutorial
ERP_URL is your organization’s ERP address. ACADEMY_URL is the Academy base address: staging uses https://erpstaging.nexcommand.ai/academy; production uses https://academy.nexcommand.ai. Saved record IDs and temporary draft IDs differ between installations. Course IDs and element IDs in the example are not portable to another installation.
Step-by-step instructions
Open batch management
Choose Supply Chain → Serials & Batches → Batch.
- Example / selection
- Serials & Batches
- Expected result
- The batch list opens.
{ERP_URL}/desk/nexcom-workflow/Supply%20Chain/Serials%20%26%20Batches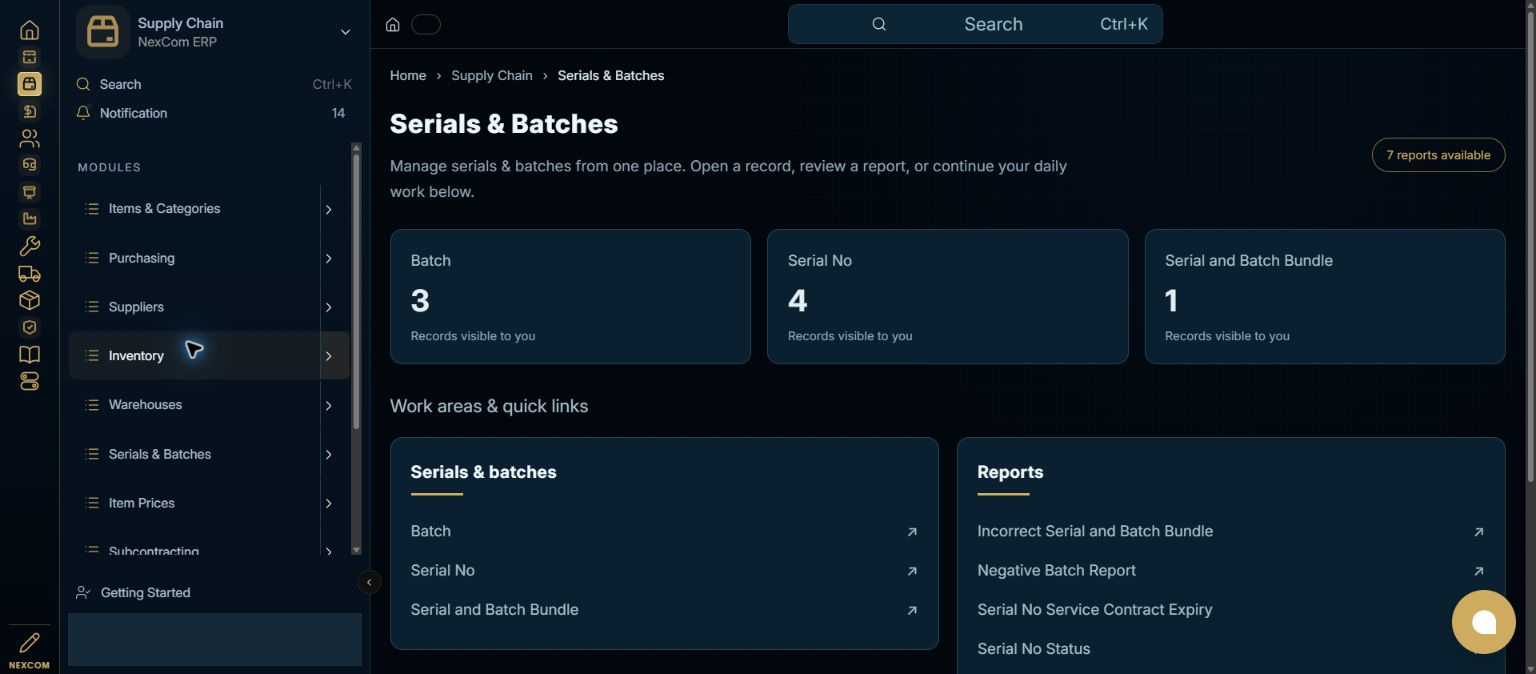
Check for an existing batch
Search the existing batch IDs before selecting Add Batch. Use the actual manufacturer or approved internal batch identifier.
- Example / selection
- NC-DOCS-BATCH-002
- Expected result
- A new batch can be created without duplicating an existing lot.
{ERP_URL}/desk/batch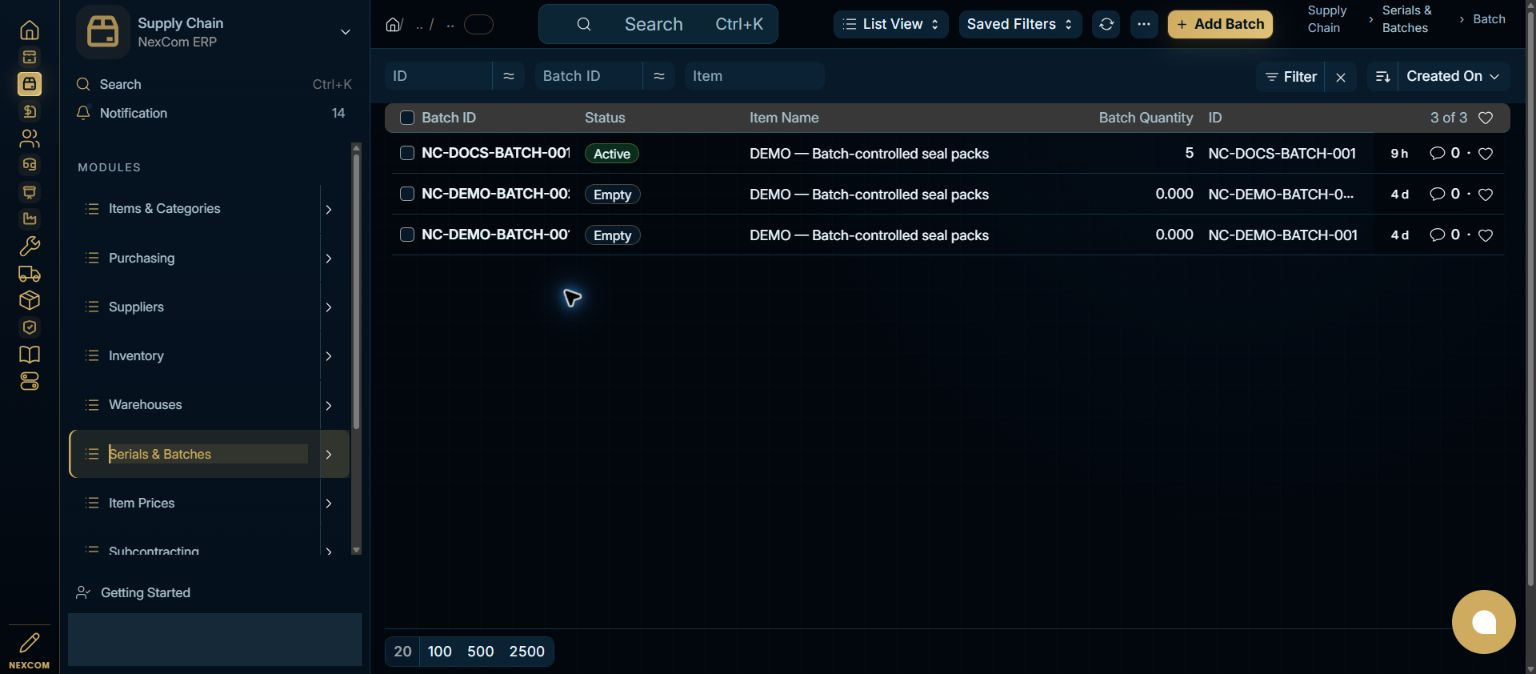
Complete batch details
Enter Batch ID and select a stock item configured with Has Batch No. Open Edit Full Form. Select manufacturing and expiry dates supported by the actual source evidence. Use the calendar if typed input clears: click the month/year header, navigate to the required year, choose the month, then choose the day. Verify the displayed date before Save. Keep negative-stock overrides off unless explicitly approved under your controls.
- Example / selection
- NC-DEMO-BATCH-SEALS; fictional expiry October 13, 2027
- Expected result
- The batch identity, item and dates are ready to save.
{ERP_URL}/desk/batch/{RECORD_ID}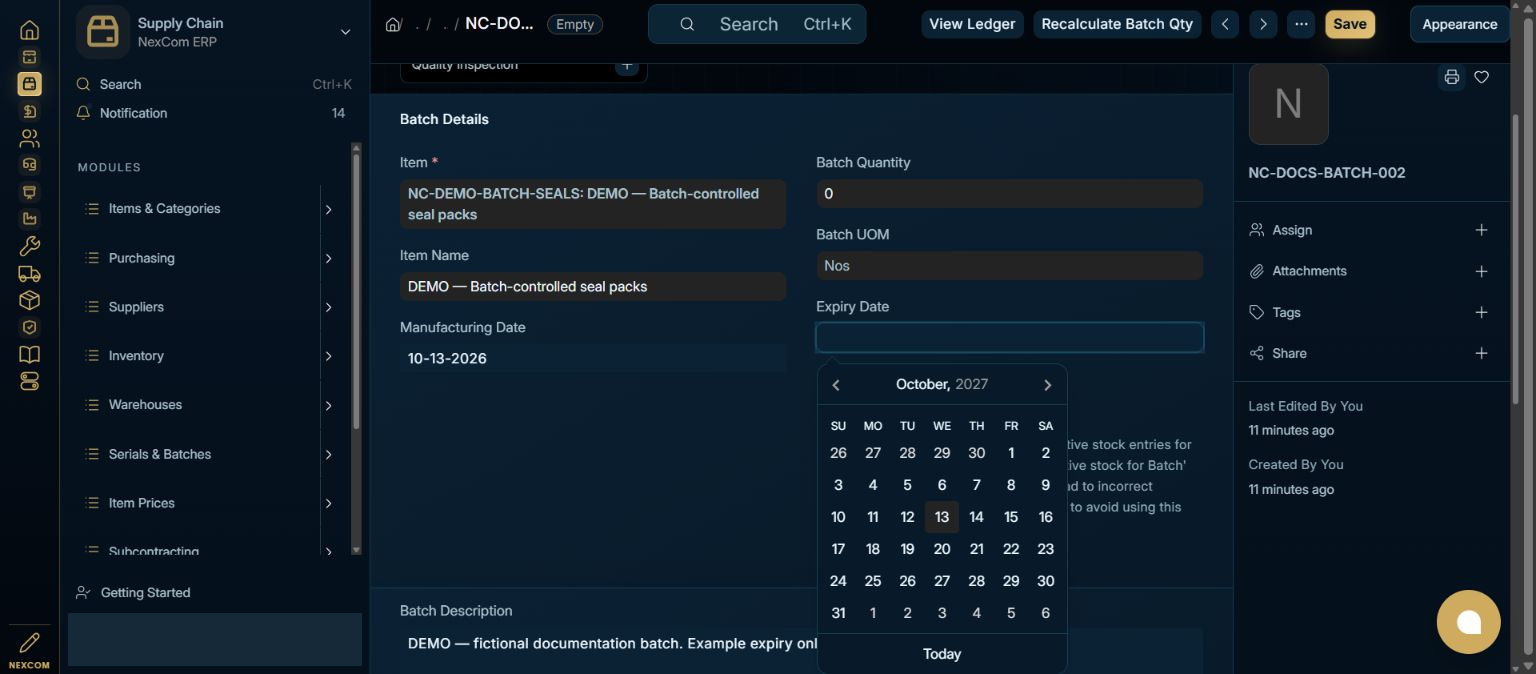
Save and inspect quantity
Save and confirm the permanent batch URL. Empty and quantity zero are expected for a new batch with no received stock. A batch master does not create inventory; use the appropriate receipt transaction and serial/batch selection.
- Example / selection
- NC-DOCS-BATCH-002; quantity 0
- Expected result
- The batch exists and is ready to be referenced by a stock transaction.
{ERP_URL}/desk/batch/{RECORD_ID}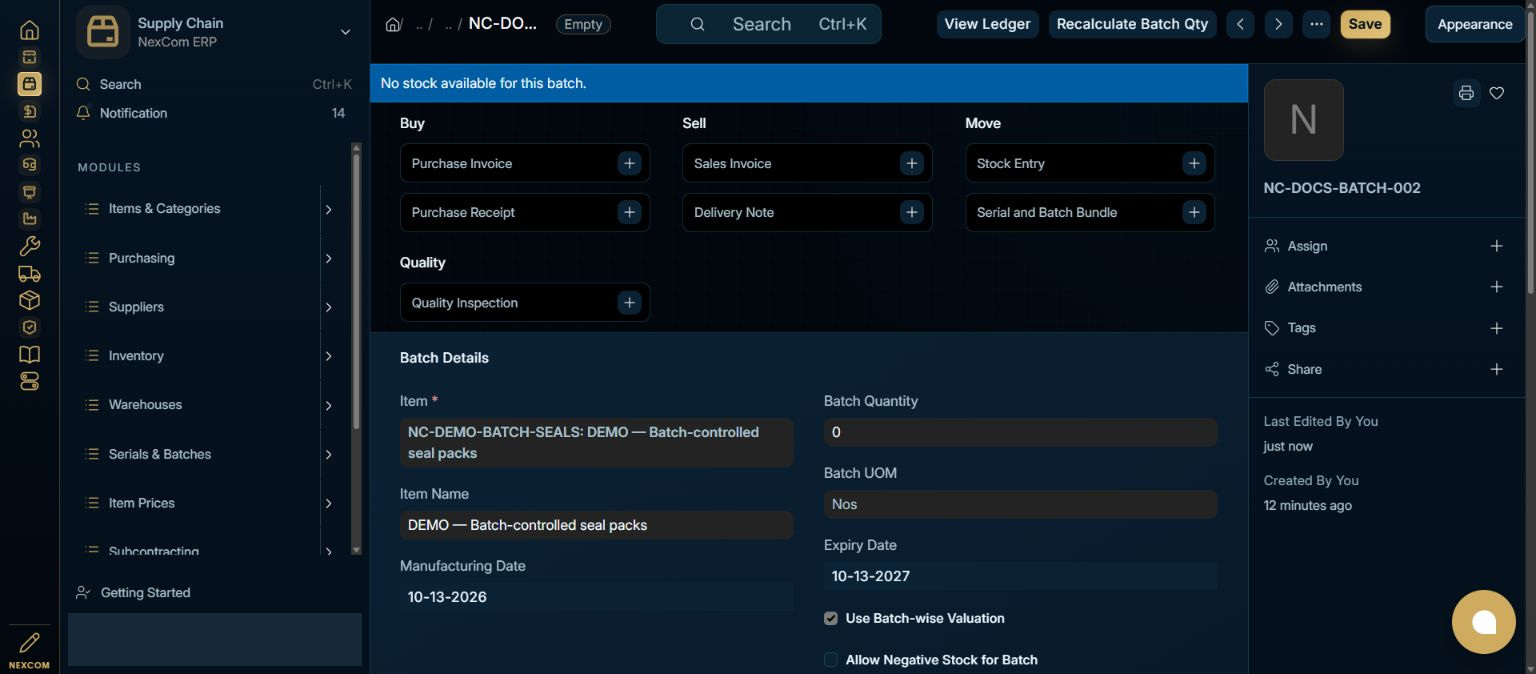
Verified result
The batch NC-DOCS-BATCH-002 was saved through staging with the controlled item, example expiry October 13, 2027 and quantity zero. The receipt/bundle tutorial uses the earlier NC-DOCS-BATCH-001. No stock was created by this master-record save. A date-picker positioning issue was repaired in staging and live during this walkthrough.
Troubleshooting
Wait for Link search results and choose the exact record. Leave each edited field to commit its value. Check required dates in every item row. A saved draft and a submitted record are different states. If validation fails, correct the highlighted field and verify the saved result before continuing.