
Send supplied material to the subcontractor
Open the submitted Subcontracting Order. Select Transfer → Material to Supplier.
Before you start
Use your authorized ERP account and the correct company. These screenshots use fictional staging records. Replace the example quantities, dates, warehouses and values with your approved business information. Submission affects the relevant workflow or stock ledger; review the draft first.
Addresses used in this tutorial
ERP_URL is your organization’s ERP address. ACADEMY_URL is the Academy base address: staging uses https://erpstaging.nexcommand.ai/academy; production uses https://academy.nexcommand.ai. Saved record IDs and temporary draft IDs differ between installations. Course IDs and element IDs in the example are not portable to another installation.
Step-by-step instructions
Create the supplier transfer
Open the submitted Subcontracting Order. Select Transfer → Material to Supplier.
- Example / selection
- SC-ORD-2026-00001
- Expected result
- A Send to Subcontractor Stock Entry is generated.
{ERP_URL}/desk/subcontracting-order/{RECORD_ID}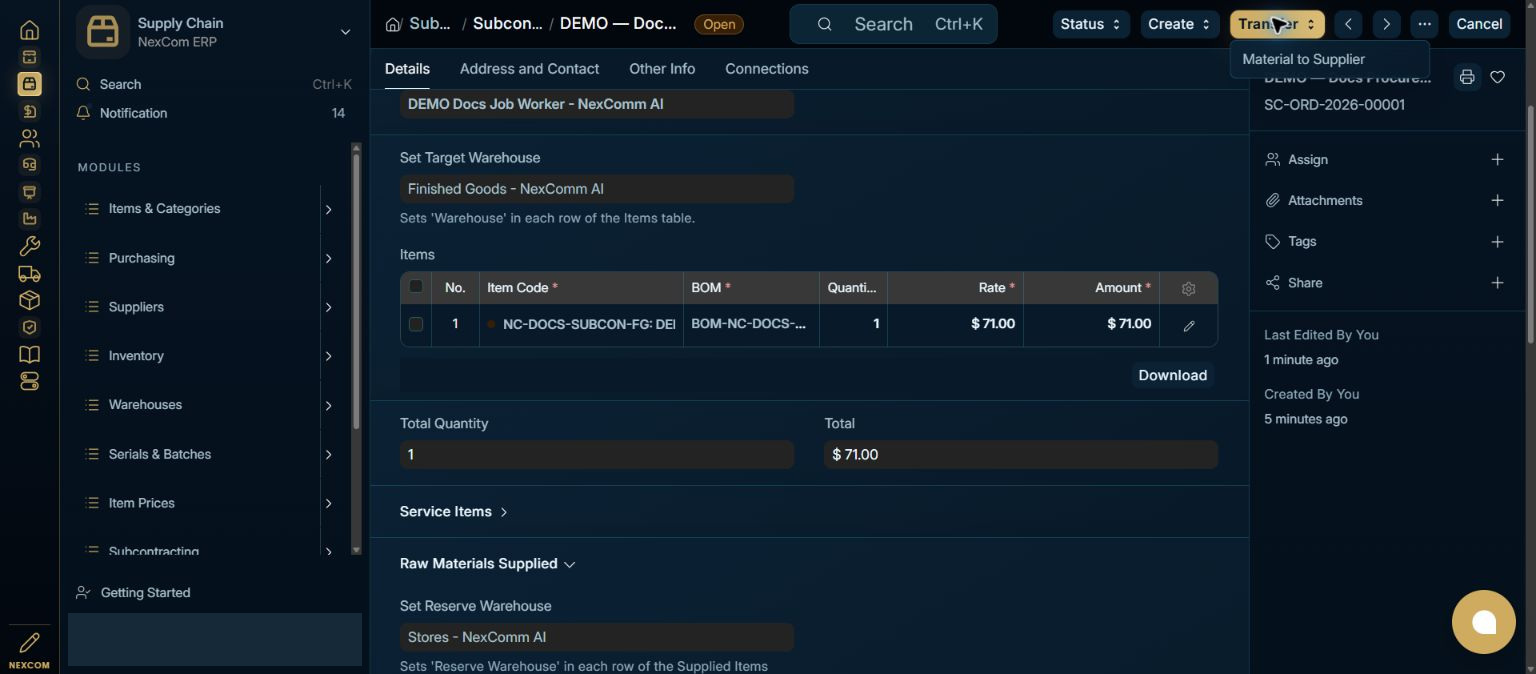
Check the linked order
Verify Stock Entry Type and Subcontracting Order. Review the posting date and time before posting.
- Example / selection
- Send to Subcontractor; SC-ORD-2026-00001
- Expected result
- The movement is linked to the correct subcontracting order.
{ERP_URL}/desk/stock-entry/new-stock-entry-{TEMP_ID}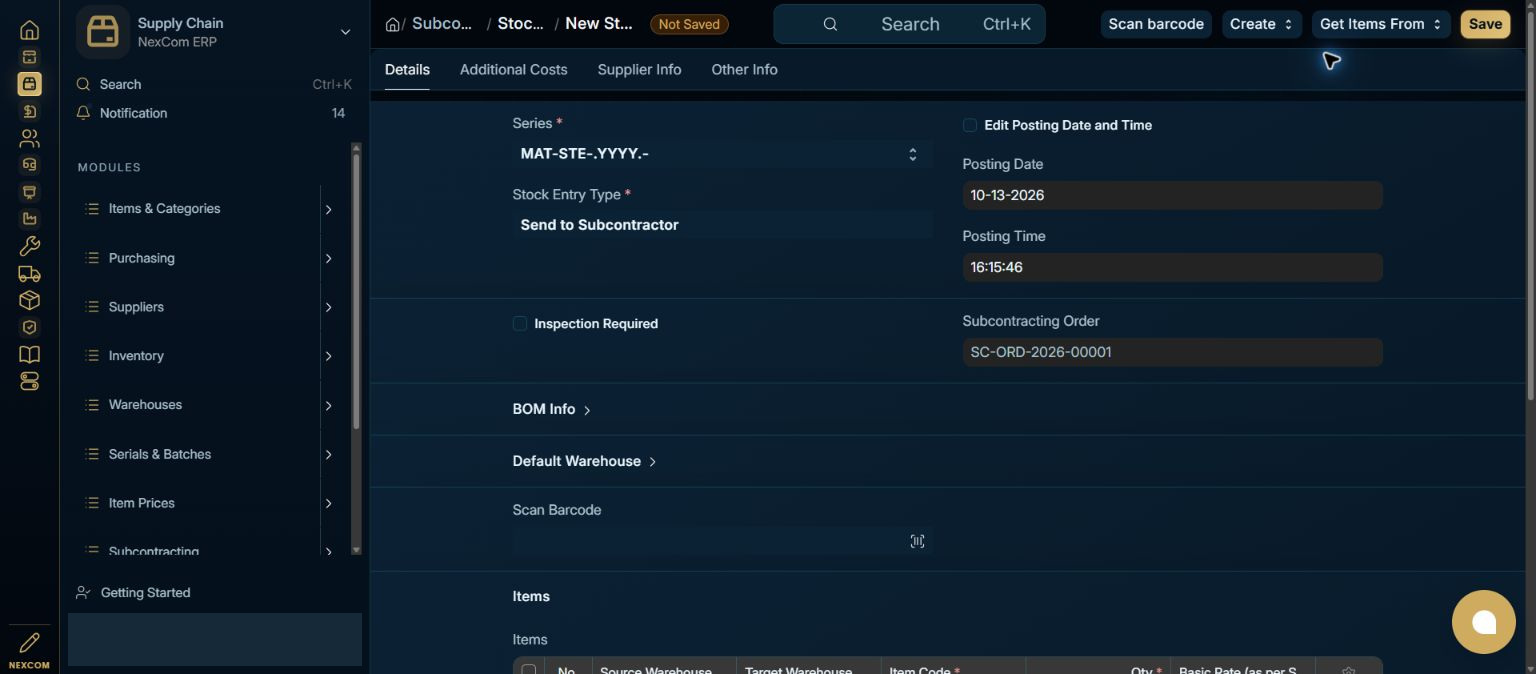
Verify materials, warehouses and valuation
Review each row: source warehouse, supplier warehouse, quantity and rate. Use Update Rate and Availability when needed, then Save. Investigate missing stock or unexpected rates before submission.
- Example / selection
- Four bolts at USD 4 and one bracket at USD 30; total USD 46
- Expected result
- The saved draft moves the required materials between the correct warehouses.
{ERP_URL}/desk/stock-entry/{RECORD_ID}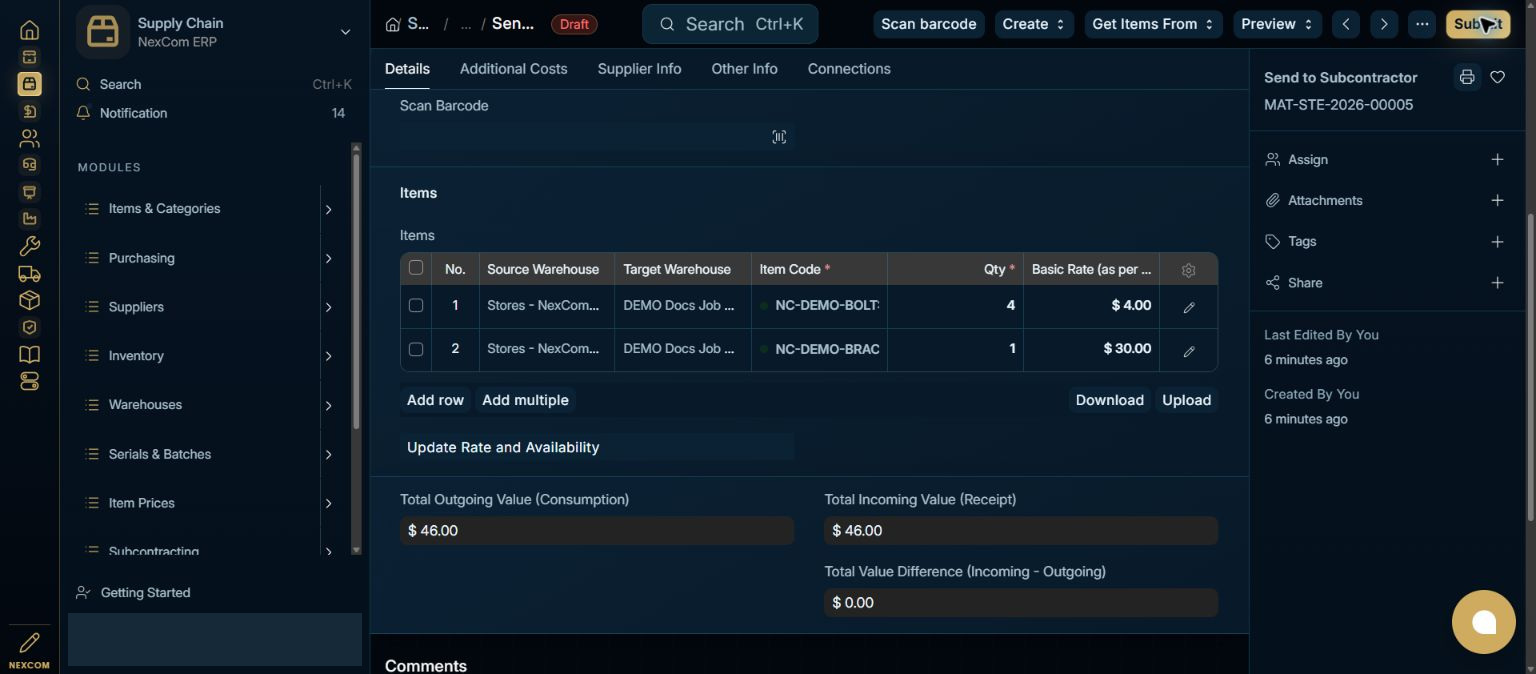
Submit and verify
Submit the reviewed Stock Entry and confirm. Check Submitted status. The materials are now held in the job-worker warehouse; they have not yet been consumed into finished goods.
- Example / selection
- MAT-STE-2026-00005; USD 46 transferred
- Expected result
- The subcontracting order updates to Material Transferred.
{ERP_URL}/desk/stock-entry/{RECORD_ID}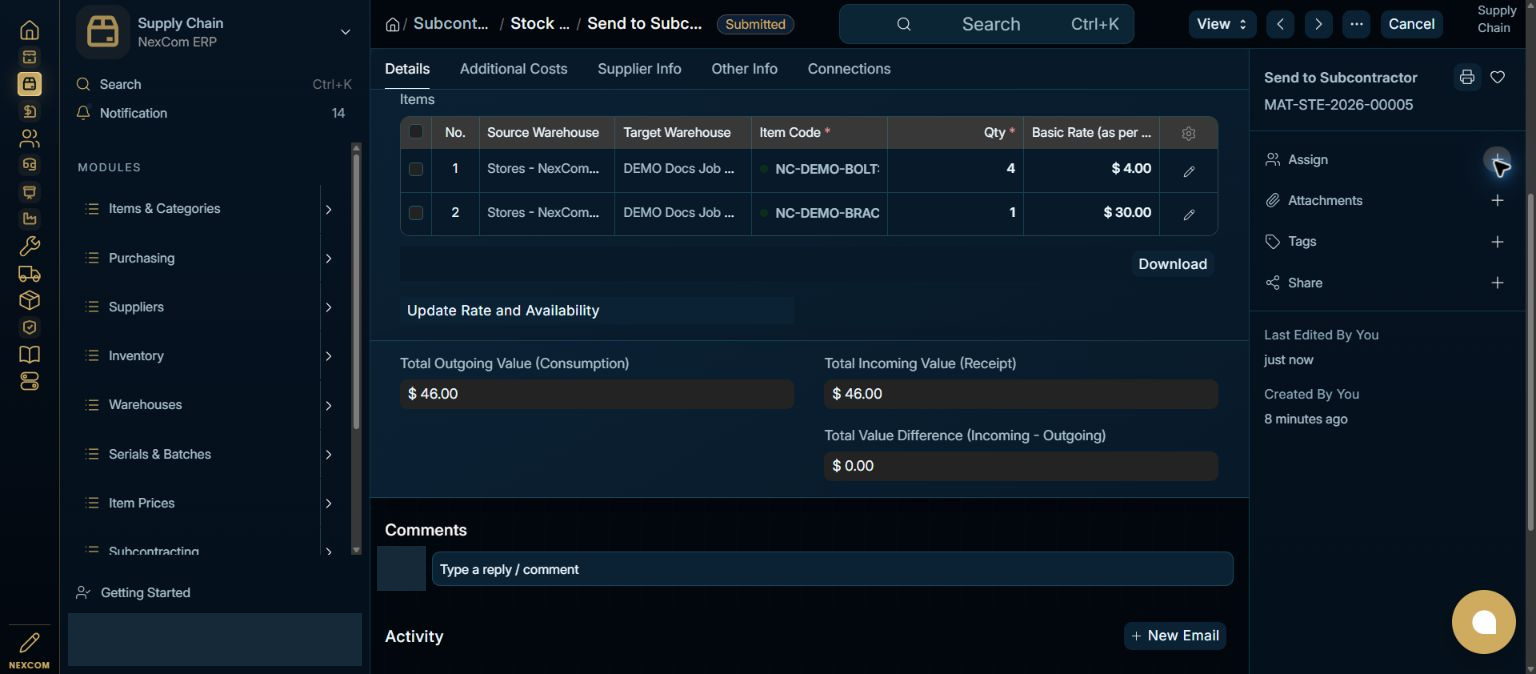
Verified result
The staging transfer was submitted and the linked order changed to Material Transferred. The subsequent receipt consumed exactly the transferred quantities.
Troubleshooting
Wait for Link search results and choose the exact record. Leave each edited field to commit its value. Check required dates in every item row. A saved draft and a submitted record are different states. If validation fails, correct the highlighted field and verify the saved result before continuing.