
Configure course assessment and trainee certificates
Select Authoring in the Academy navigation, locate your course and open its title. Confirm that you are opening the course, rather than its separate test resource.
Before you start
Sign in with your own ERP identity. You need ownership or the permitted course-management role for the selected course. This demonstration uses a private preparation-stage course in staging. Changing one course does not change the certificate policy of other courses.
Addresses used in this tutorial
ERP_URL is your organization’s ERP address. ACADEMY_URL is the Academy base address: staging uses https://erpstaging.nexcommand.ai/academy; production uses https://academy.nexcommand.ai. Saved record IDs and temporary draft IDs differ between installations. Course IDs and element IDs in the example are not portable to another installation.
Step-by-step instructions
Find the course in Authoring
Select Authoring in the Academy navigation, locate your course and open its title. Confirm that you are opening the course, rather than its separate test resource.
- Example / selection
- DEMO — NexCom Quality and Document Control
- Expected result
- The course player and its Administration menu become available.
{ACADEMY_URL}/auth/RepositorySite/0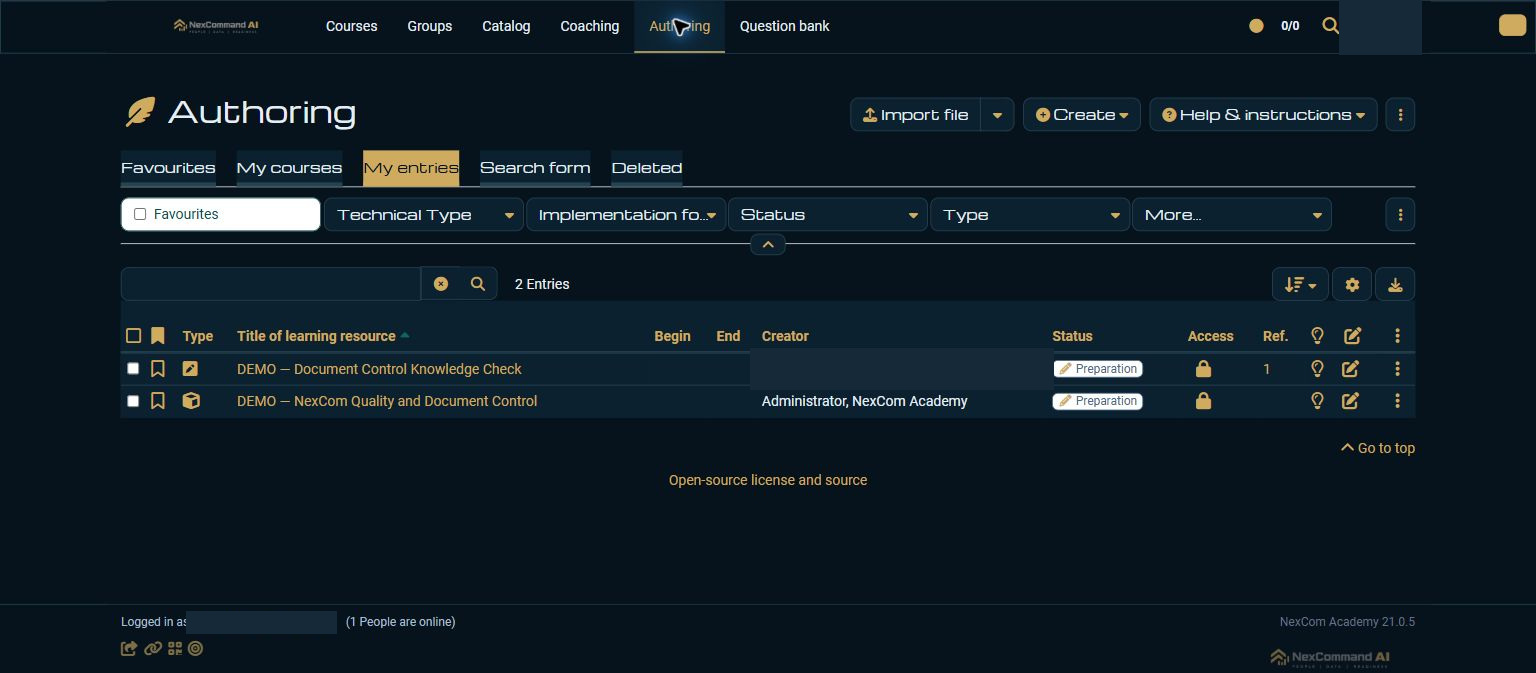
Open course Settings
Open Administration and choose Settings. Course editing, member management and the assessment tool are different destinations in this menu.
- Example / selection
- Administration → Settings
- Expected result
- Course settings show Info, Share, Assessment and other tabs.
{ACADEMY_URL}/auth/RepositoryEntry/{COURSE_ID}/CourseNode/{ELEMENT_ID}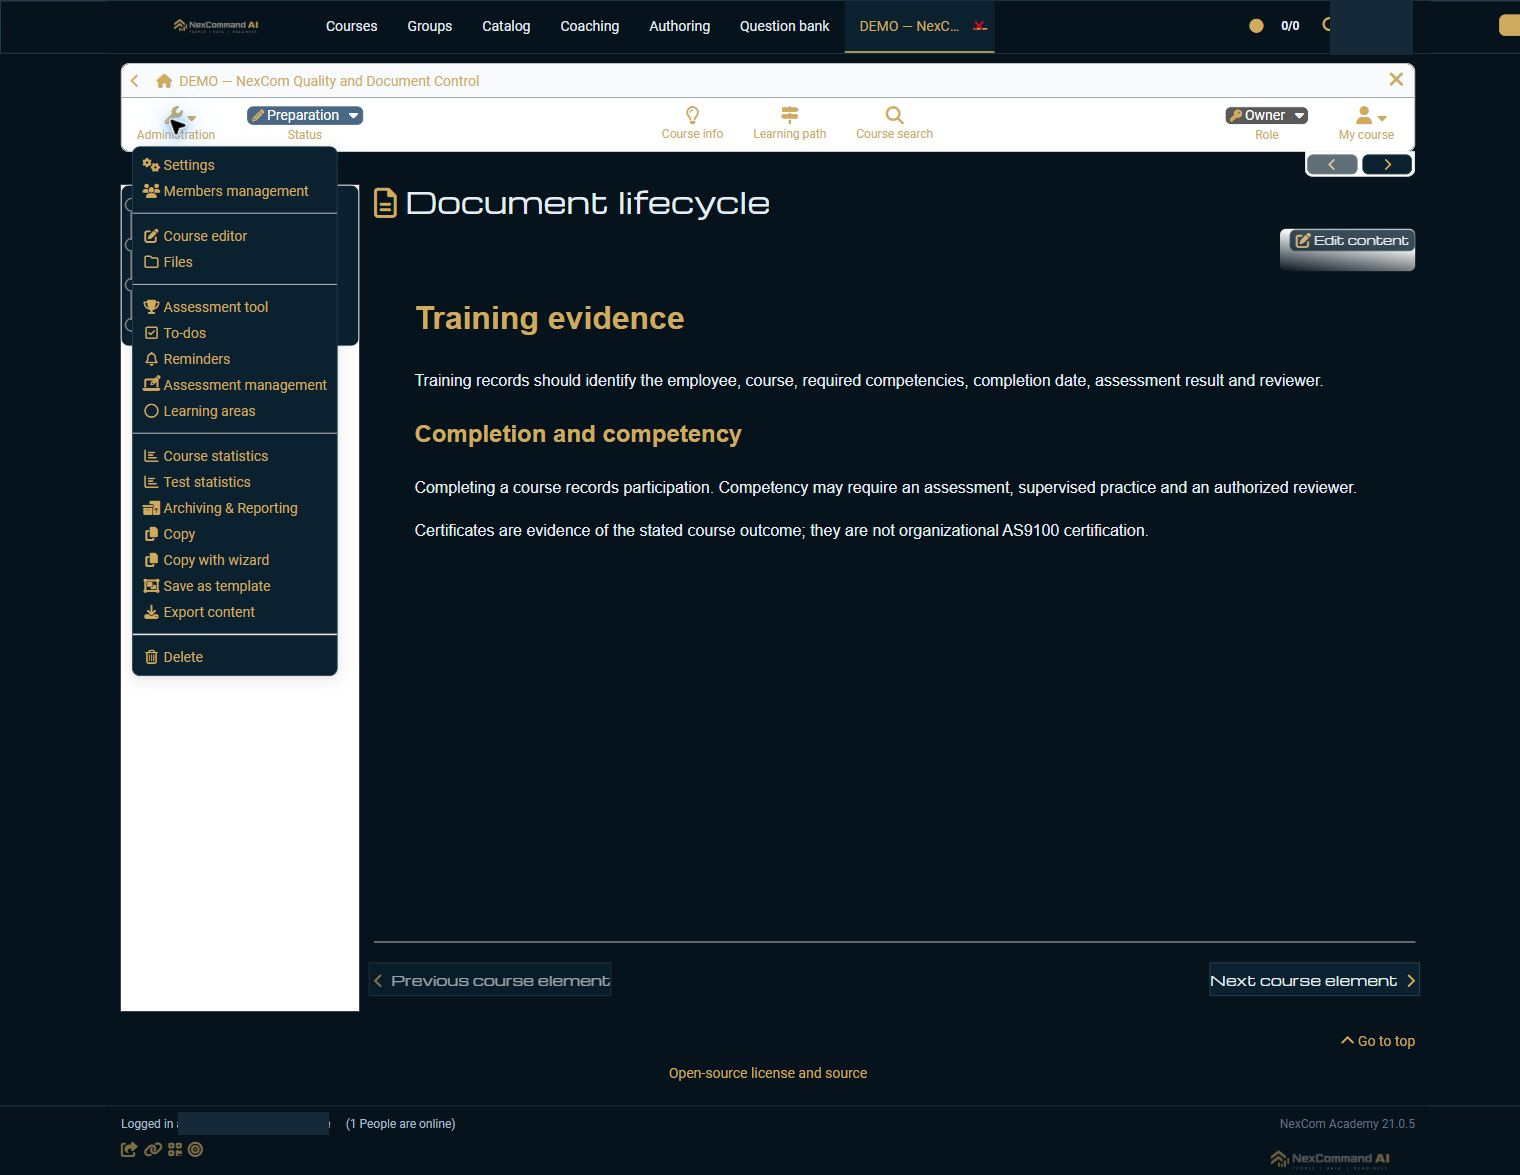
Review how the course is passed
Choose Assessment. Review the scoring and success-status rules before enabling certificates. Use Show course elements to inspect which mandatory elements contribute to progress and passing. The screen states that multiple enabled criteria are alternatives: meeting at least one can pass the course.
- Example / selection
- Learning progress 100%; three mandatory elements in this demo
- Expected result
- The intended passing rule is explicit. Do not assume that ticking more alternatives makes the rule more restrictive.
{ACADEMY_URL}/auth/RepositoryEntry/{COURSE_ID}/Settings/0/Assessment/0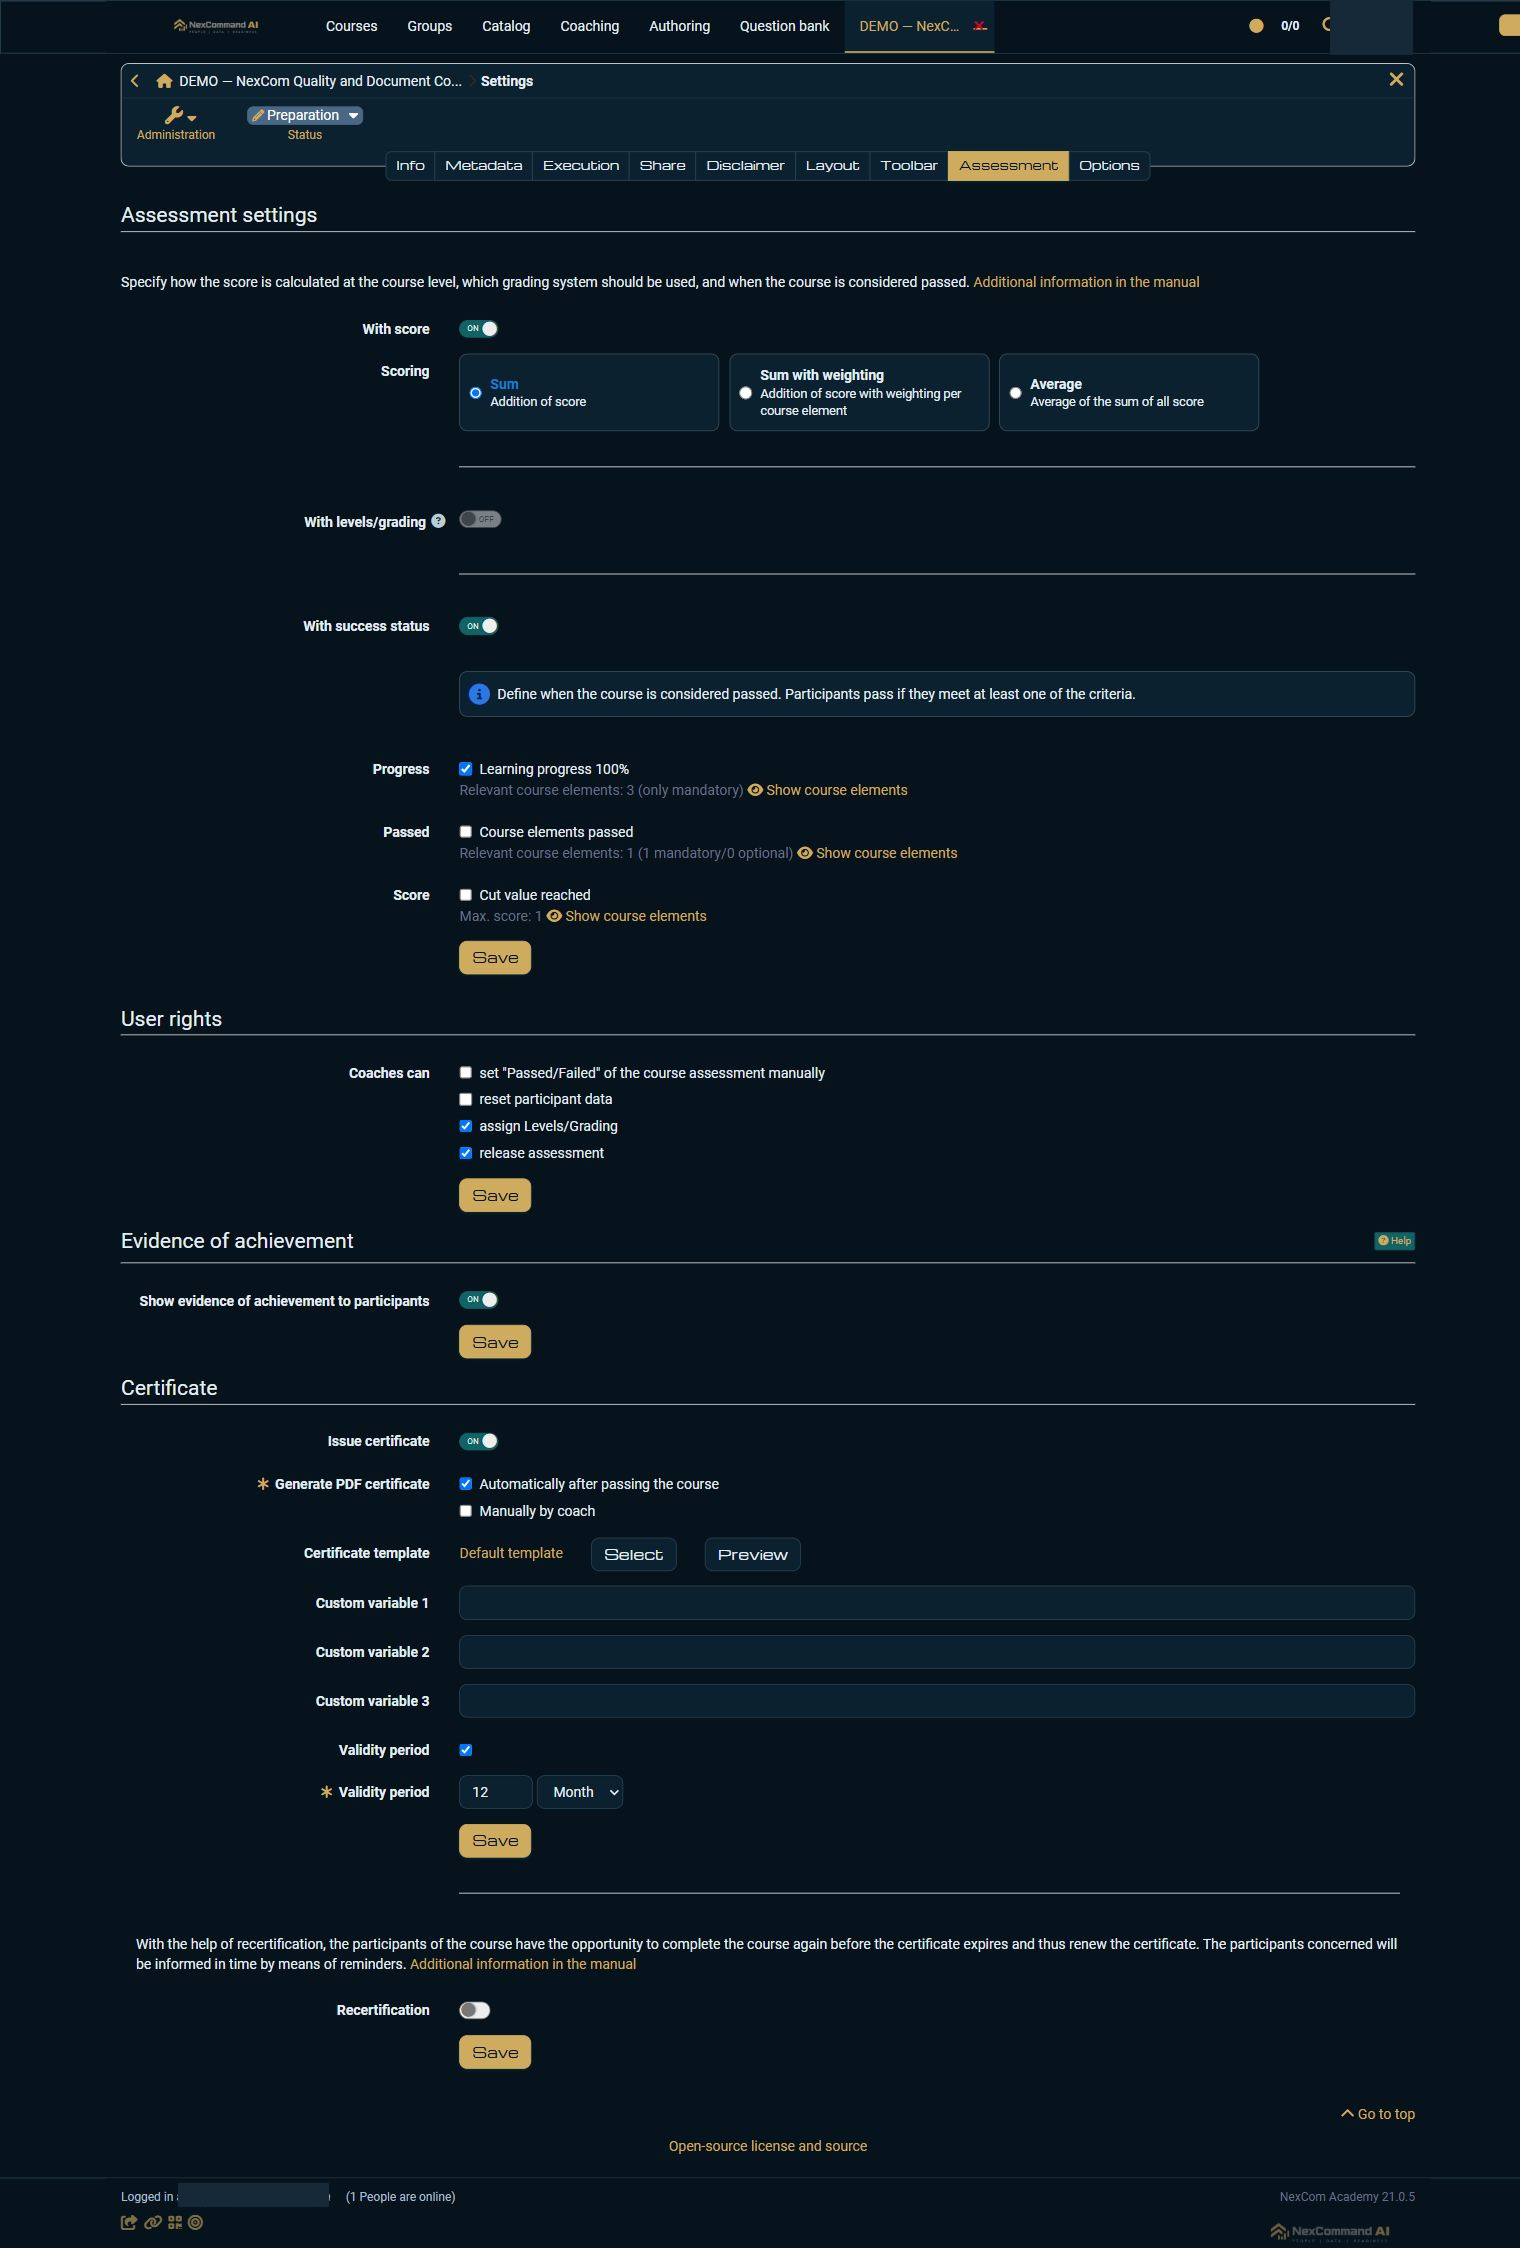
Choose certificate generation and a template
In Certificate, enable Issue certificate and choose the permitted generation method. Automatically after passing uses the course passing result. Manually by coach is a separate configuration option and requires an authorized coach action. Select or preview an approved template; a setting alone is not evidence that a PDF was issued.
- Example / selection
- Automatic generation; branded default template
- Expected result
- The course certificate policy is ready for the intended completion process. Manual coach issuance remains a separate task.
{ACADEMY_URL}/auth/RepositoryEntry/{COURSE_ID}/Settings/0/Assessment/0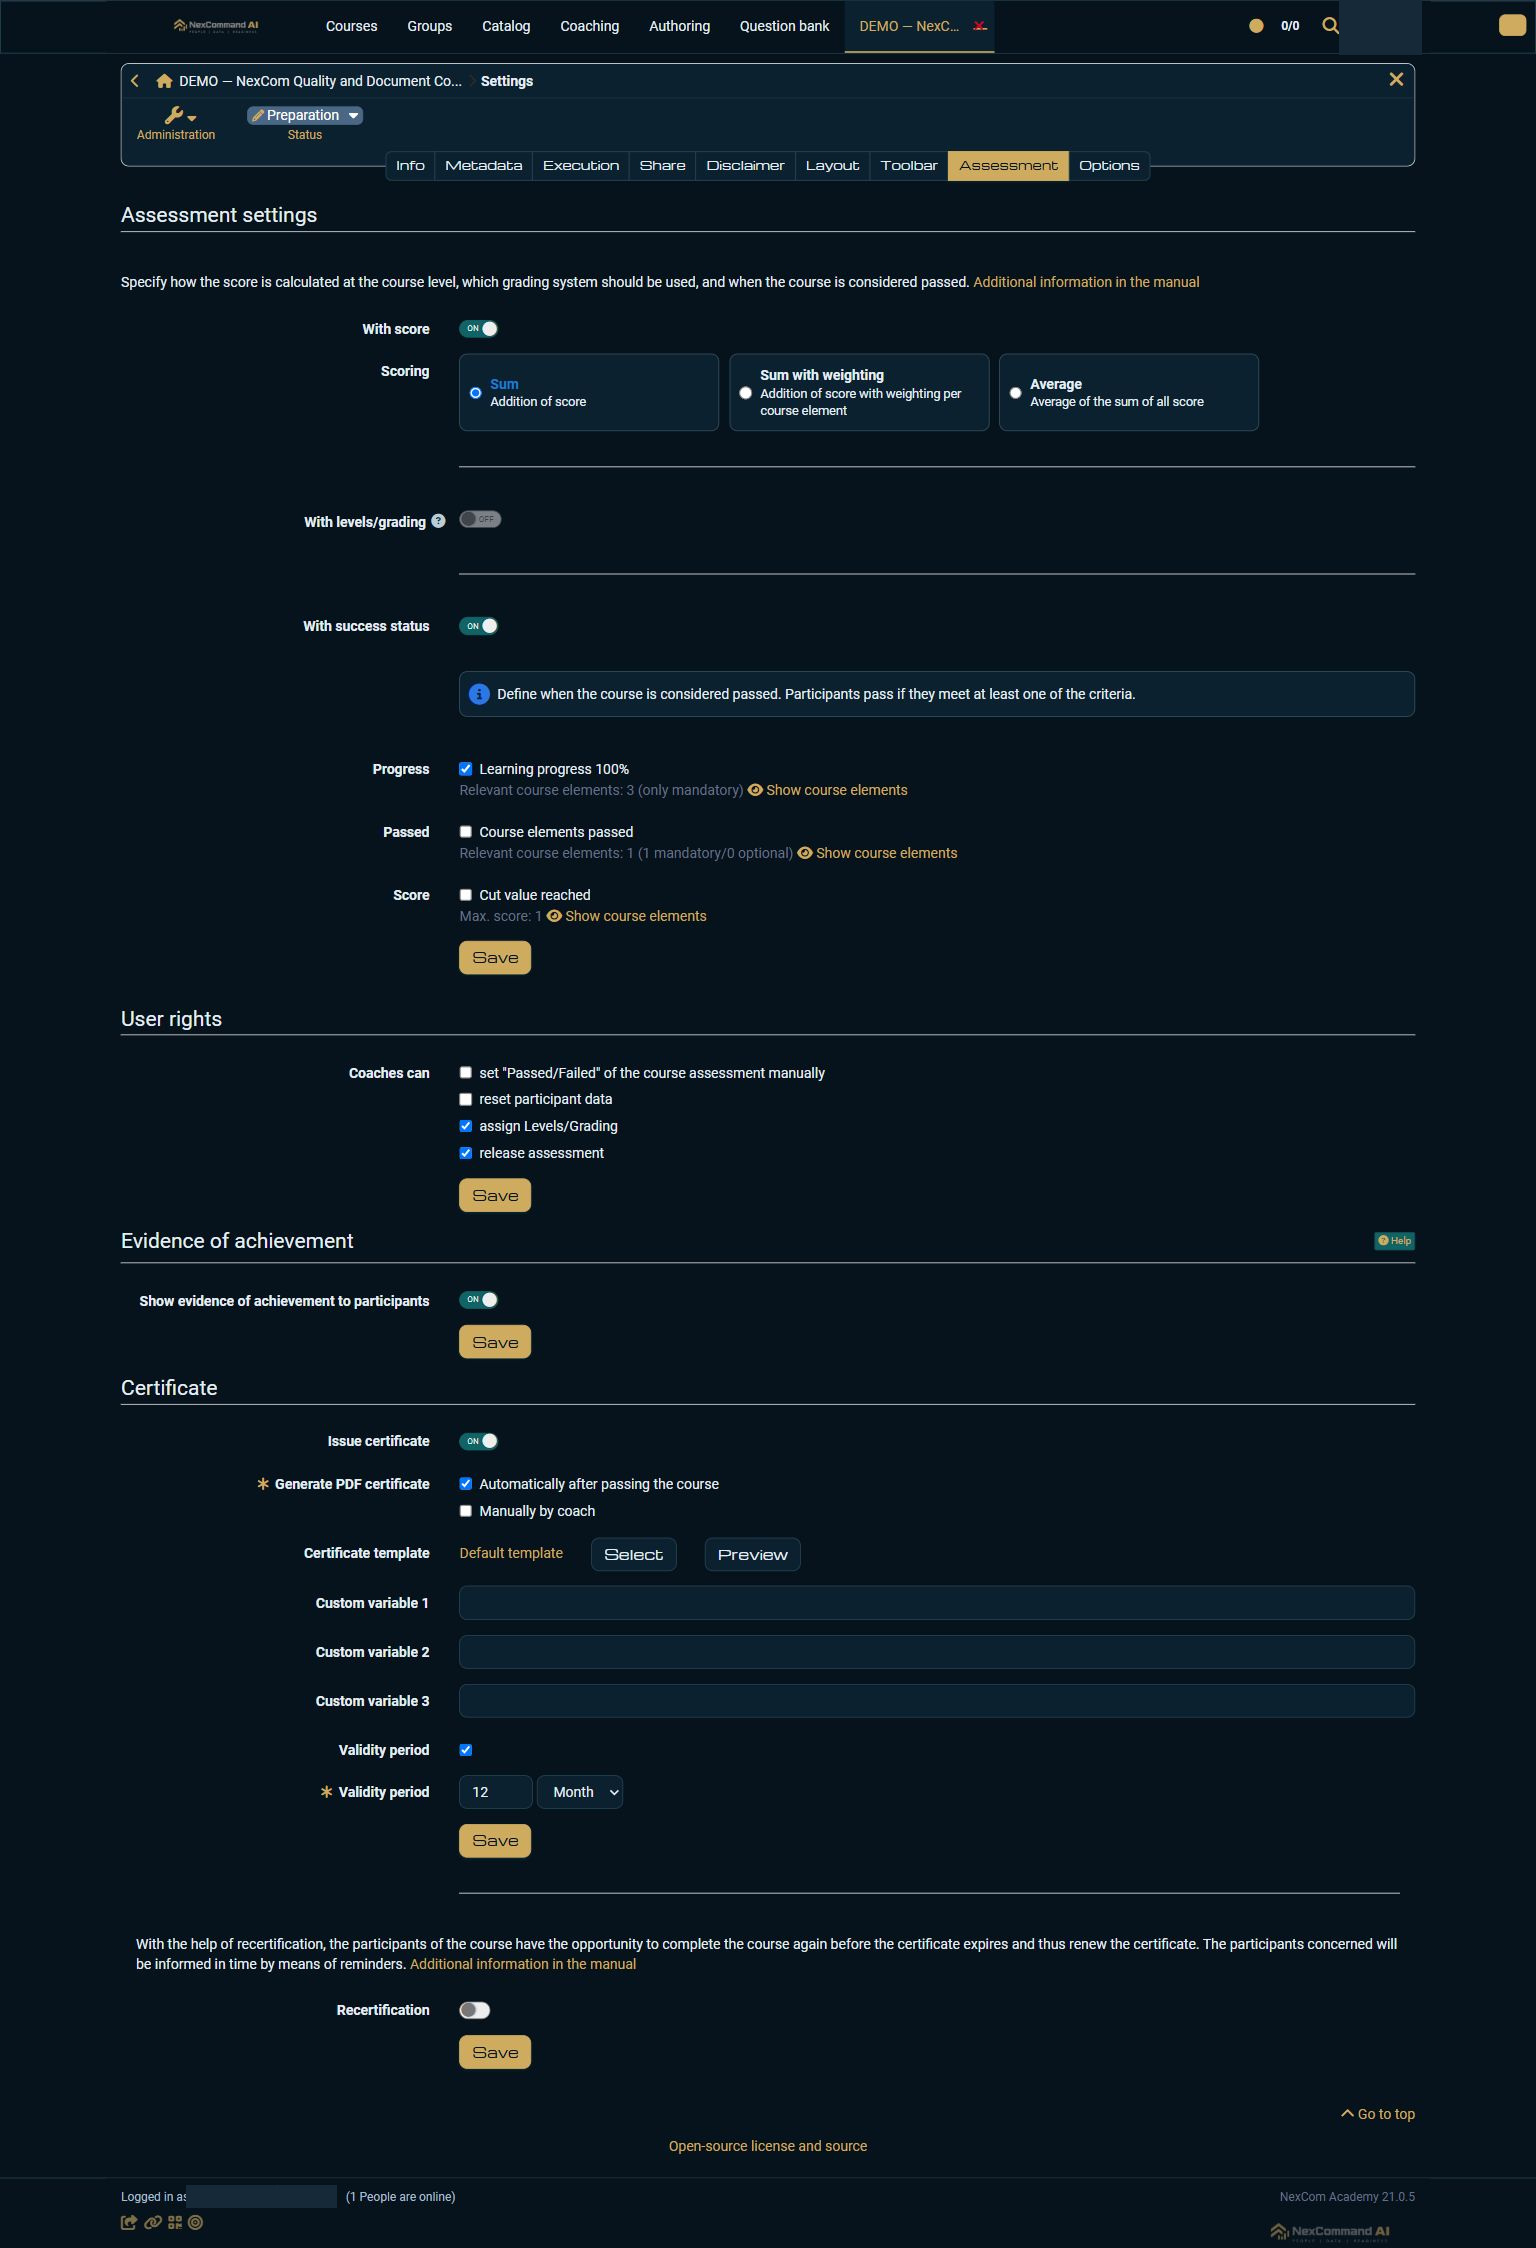
Set validity and save the certificate policy
Enable Validity period when your training policy requires expiry. Enter a positive duration and choose Day, Week, Month or Year. Save in the Certificate section. Reopen or reload this tab to verify the saved value. Each settings section has its own Save button.
- Example / selection
- 12 Month, saved and reloaded in staging
- Expected result
- The saved 12-month setting remains visible. Recertification is available below it but remains off in this demonstration.
{ACADEMY_URL}/auth/RepositoryEntry/{COURSE_ID}/Settings/0/Assessment/0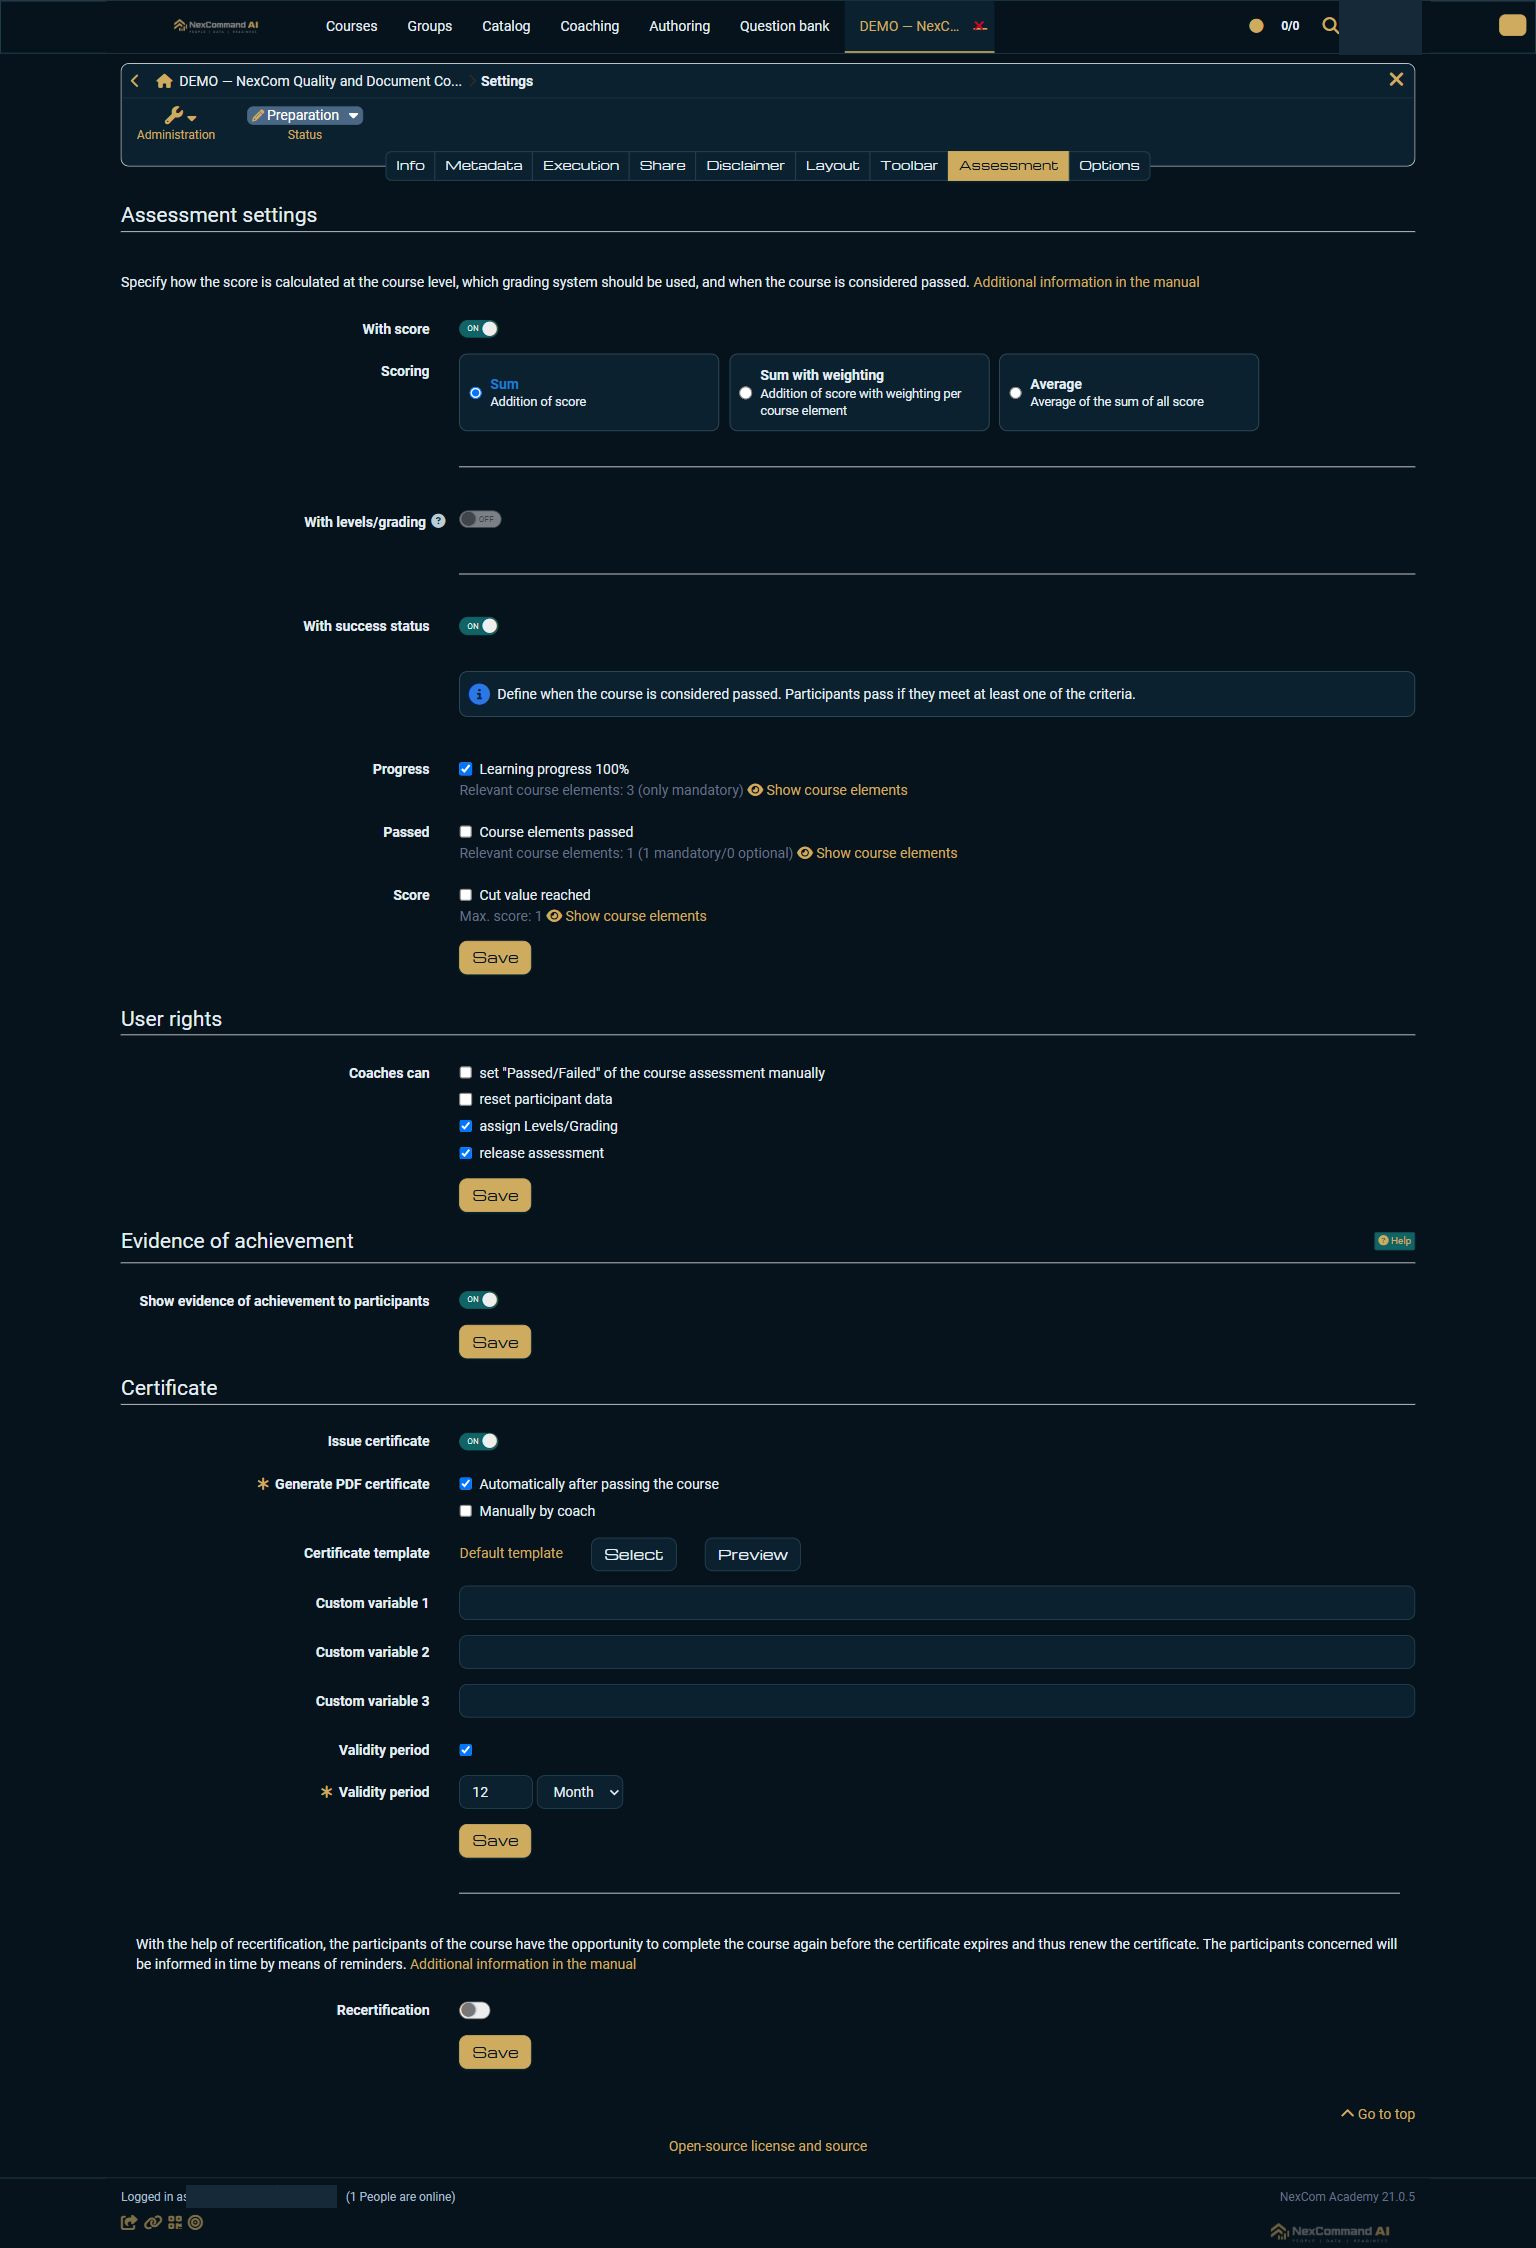
Verified result
Certificate settings were inspected and the 12-month validity was saved and read back. A subsequent synthetic attempt passed and produced an actual certificate. This article does not claim that manual coach issuance, reminders or recertification were executed.
Troubleshooting
If Assessment or Administration is unavailable, check your existing course role. If no certificate is generated, inspect the overall course success status, the generation method and the actual certificate list. A completed lesson, a passed test and a passed course are distinct results. Use positive validity durations and the correct section’s Save button.