
Create a template and a size-based item variant
Open Supply Chain → Items & Categories → Item Attribute. Reuse an enabled attribute when it already describes your product; avoid creating equivalent duplicates.
Before you start
Use your authorized ERP account and the correct company. These screenshots use fictional staging records. Replace the example quantities, dates, warehouses and values with your approved business information. Submission affects the relevant workflow or stock ledger; review the draft first.
Addresses used in this tutorial
ERP_URL is your organization’s ERP address. ACADEMY_URL is the Academy base address: staging uses https://erpstaging.nexcommand.ai/academy; production uses https://academy.nexcommand.ai. Saved record IDs and temporary draft IDs differ between installations. Course IDs and element IDs in the example are not portable to another installation.
Step-by-step instructions
Review existing attributes
Open Supply Chain → Items & Categories → Item Attribute. Reuse an enabled attribute when it already describes your product; avoid creating equivalent duplicates.
- Example / selection
- Size and Colour
- Expected result
- The controlled attribute directory is available.
{ERP_URL}/desk/item-attribute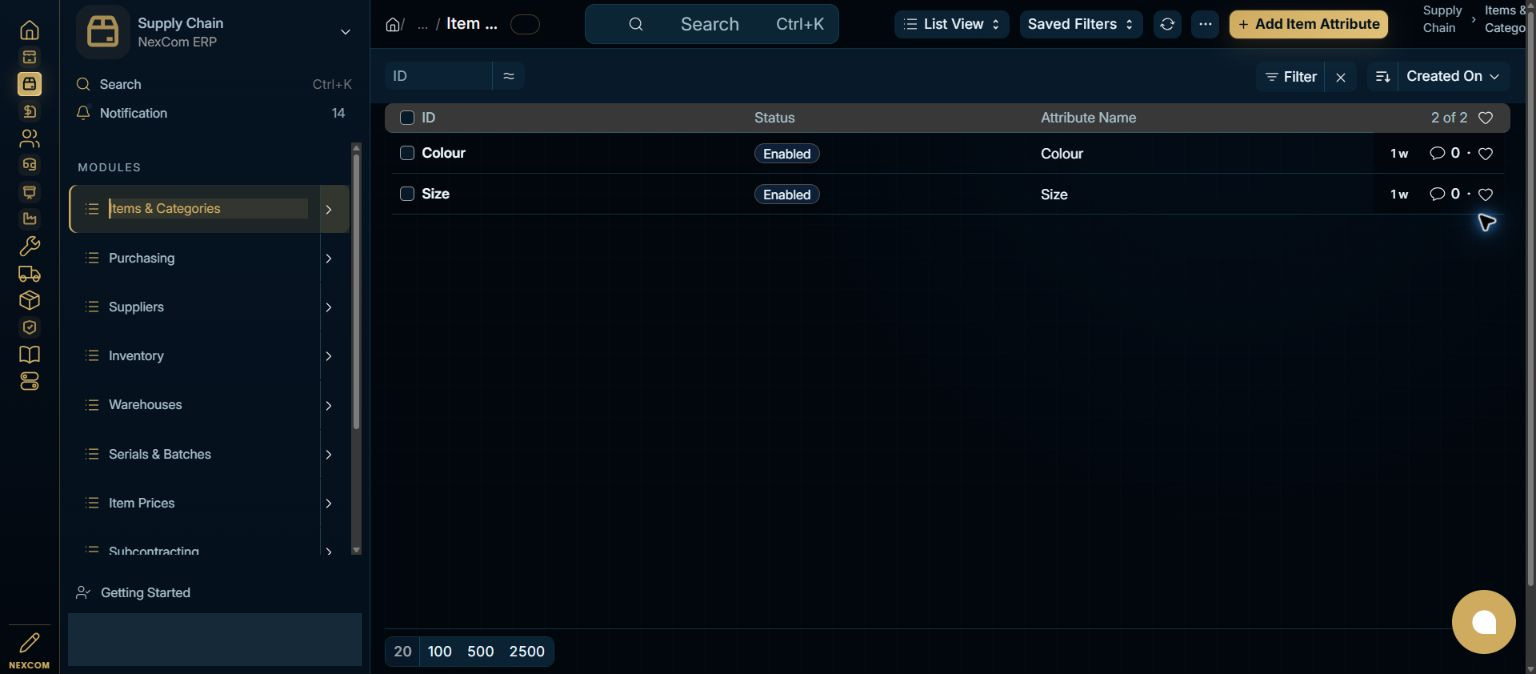
Review allowed values and abbreviations
Open Size. Check Attribute Value and Abbreviation. Discrete values and numeric ranges are different configurations; this example uses discrete values. Do not change shared values without reviewing existing variants.
- Example / selection
- Medium; abbreviation M
- Expected result
- The desired value is already available.
{ERP_URL}/desk/item-attribute/{RECORD_ID}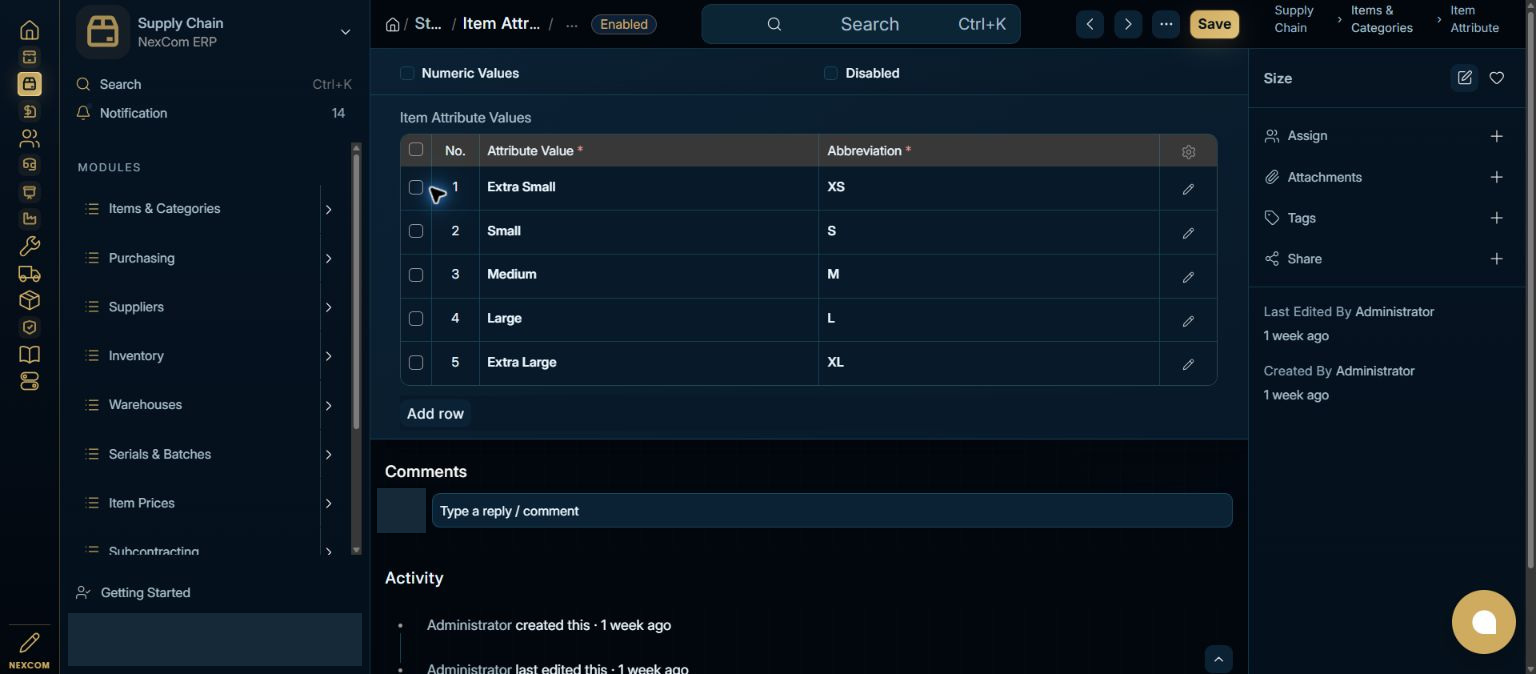
Create a template item
Create a unique Item with its name, group and stock UOM, then open the full form. Enable Has Variants. Review stock, purchase and sales settings for the products that will inherit them.
- Example / selection
- NC-DOCS-COVER; protective cover; Nos
- Expected result
- The Variants tab becomes available.
{ERP_URL}/desk/item/new-item-{TEMP_ID}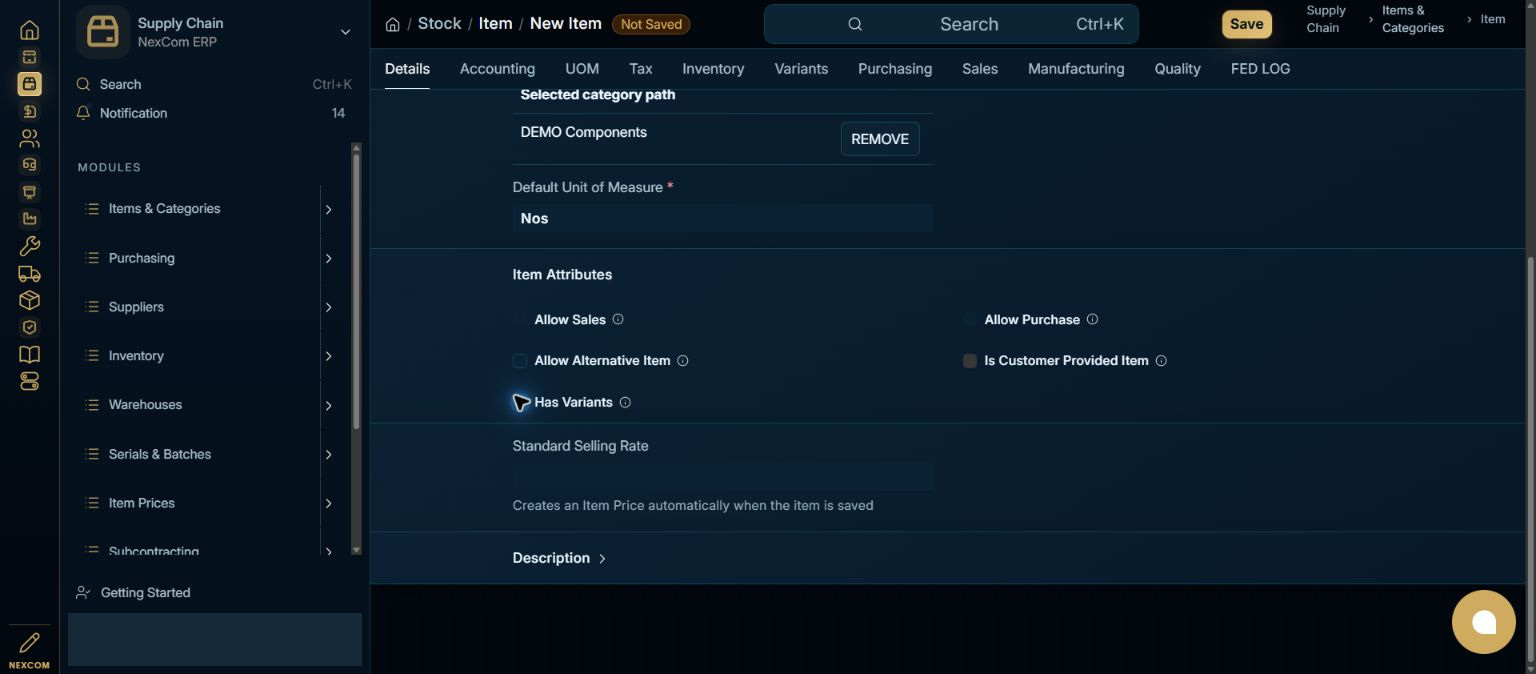
Set the template attribute
Open Variants. Keep Variant Based On as Item Attribute and add Size to Variant Attributes. Wait for the Link search and choose the exact Size result. Remove accidental empty rows before saving.
- Example / selection
- One Size attribute row
- Expected result
- The template has a complete attribute definition.
{ERP_URL}/desk/item/new-item-{TEMP_ID}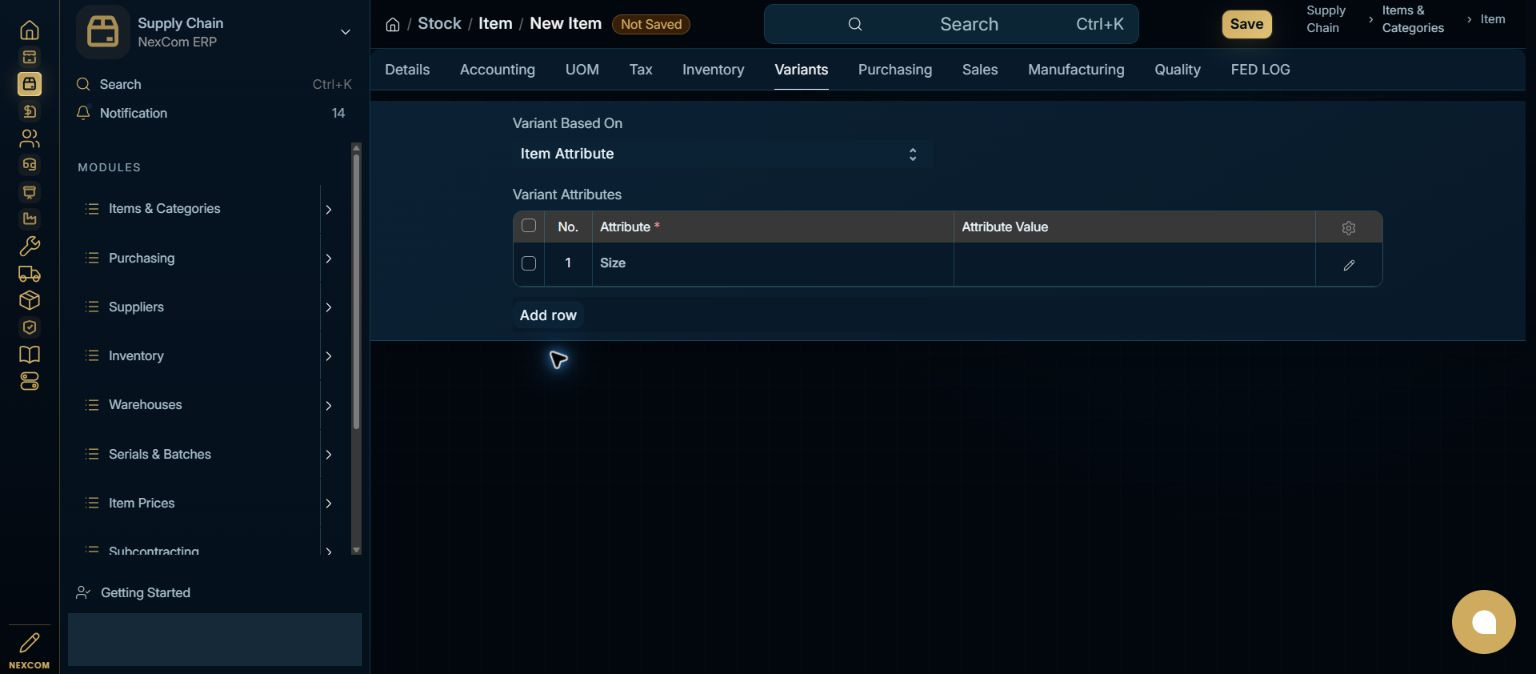
Save and distinguish the template
Save the item. Confirm Template status. The template itself cannot be used in transactions; create individual variants for the required configurations. Review Item Variant Settings when controlling which fields are copied.
- Example / selection
- NC-DOCS-COVER
- Expected result
- The saved template is ready to create variants.
{ERP_URL}/desk/item/{RECORD_ID}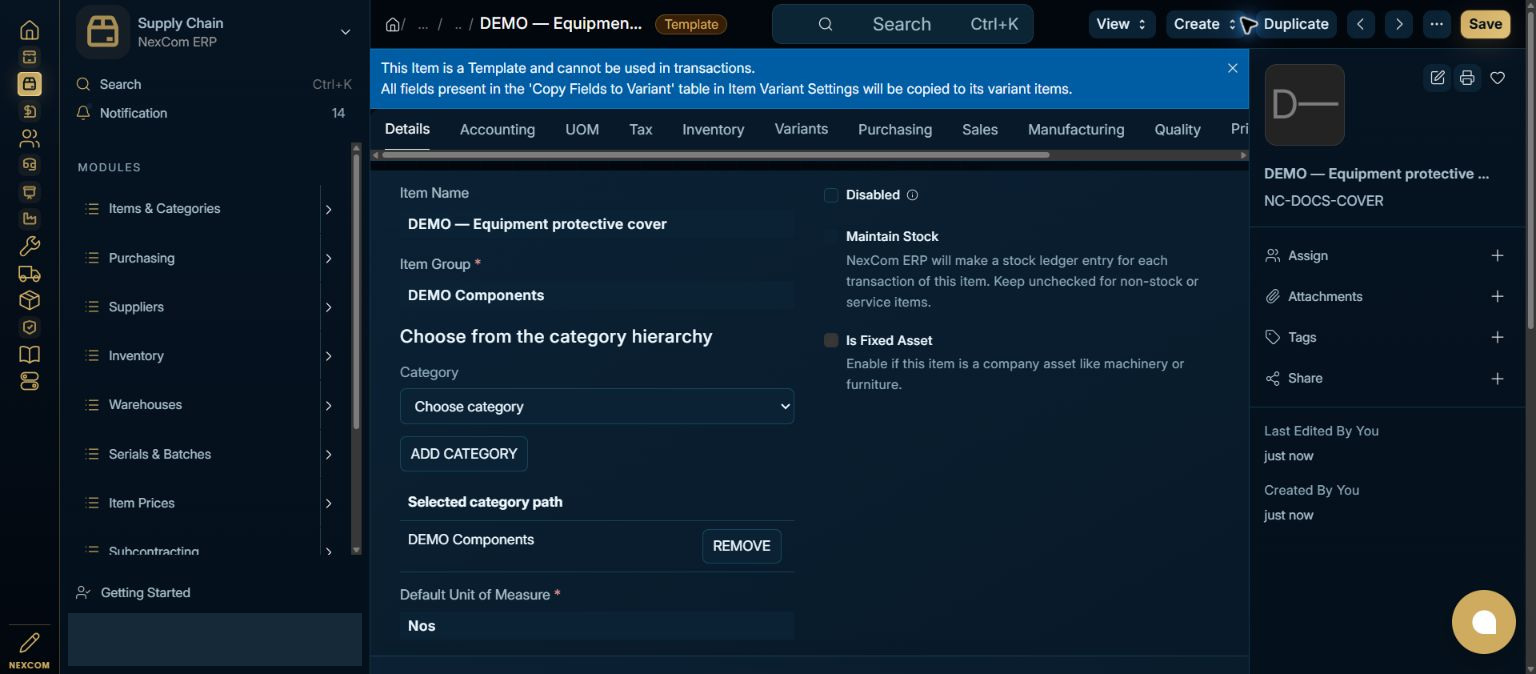
Start a single variant
Choose Create → Single Variant on the template. Multiple Variants is a separate action for combinations and should be reviewed carefully before generating many records.
- Example / selection
- Single Variant
- Expected result
- The attribute-value dialog opens.
{ERP_URL}/desk/item/{RECORD_ID}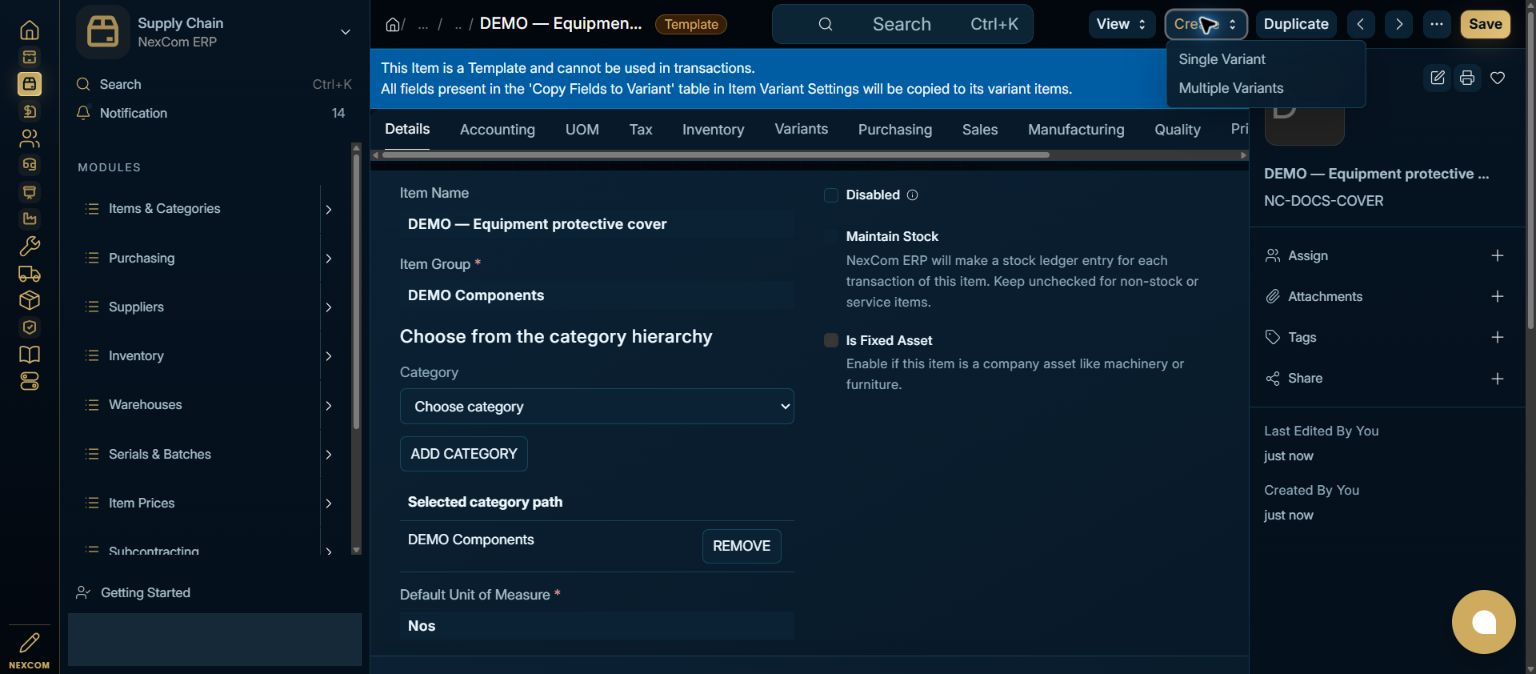
Choose the allowed value
Select Medium from the Size options and choose Create.
- Example / selection
- Medium
- Expected result
- The new variant form is generated.
{ERP_URL}/desk/item/{RECORD_ID}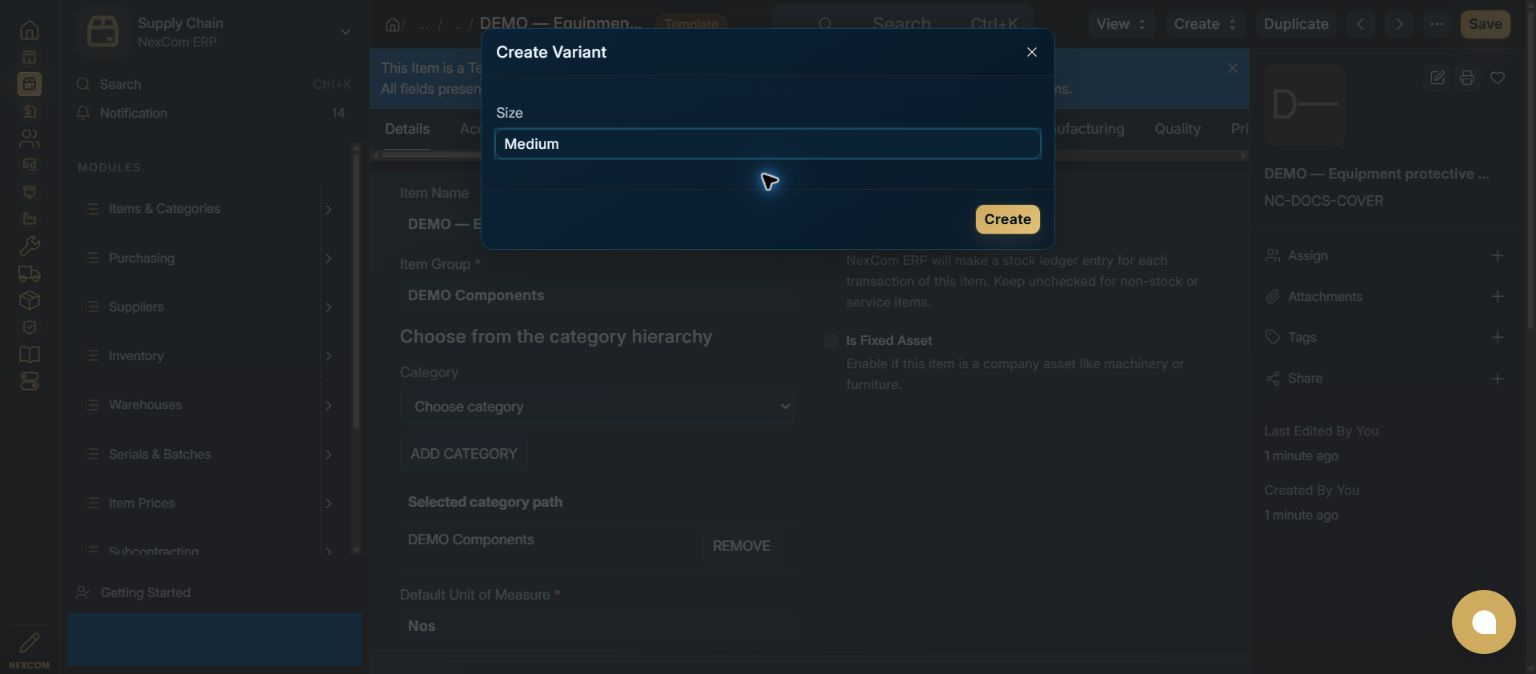
Review generated identity
Check the generated code, name, group and stock UOM. Review Accounting, Inventory and commercial settings before Save.
- Example / selection
- NC-DOCS-COVER-M
- Expected result
- The variant identity reflects the selected abbreviation.
{ERP_URL}/desk/item/new-item-{TEMP_ID}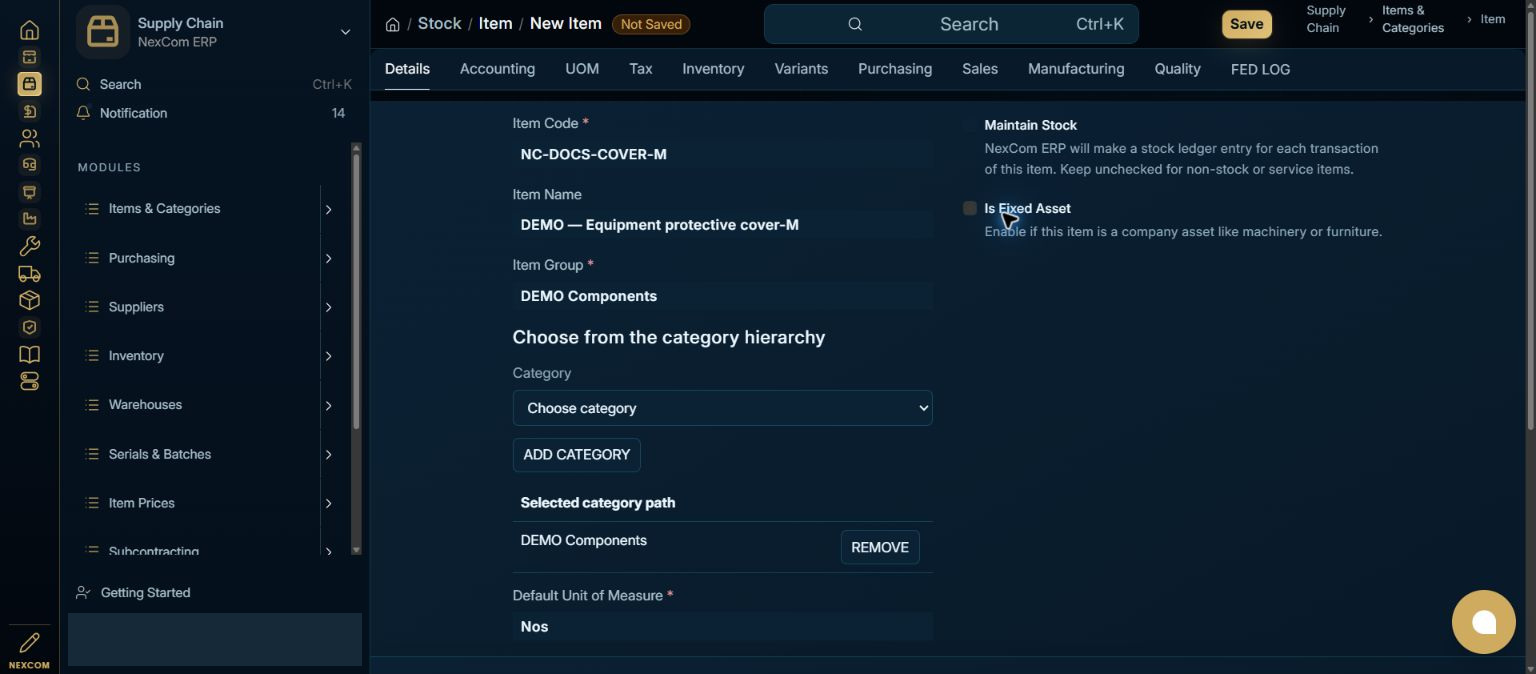
Save and verify the relationship
Save, reopen Variants, and verify Variant Of and Attribute Value. Use the saved individual variant code in transactions. Maintaining a master does not create inventory.
- Example / selection
- Variant Of NC-DOCS-COVER; Size Medium
- Expected result
- The variant is saved with its template relationship.
{ERP_URL}/desk/item/{RECORD_ID}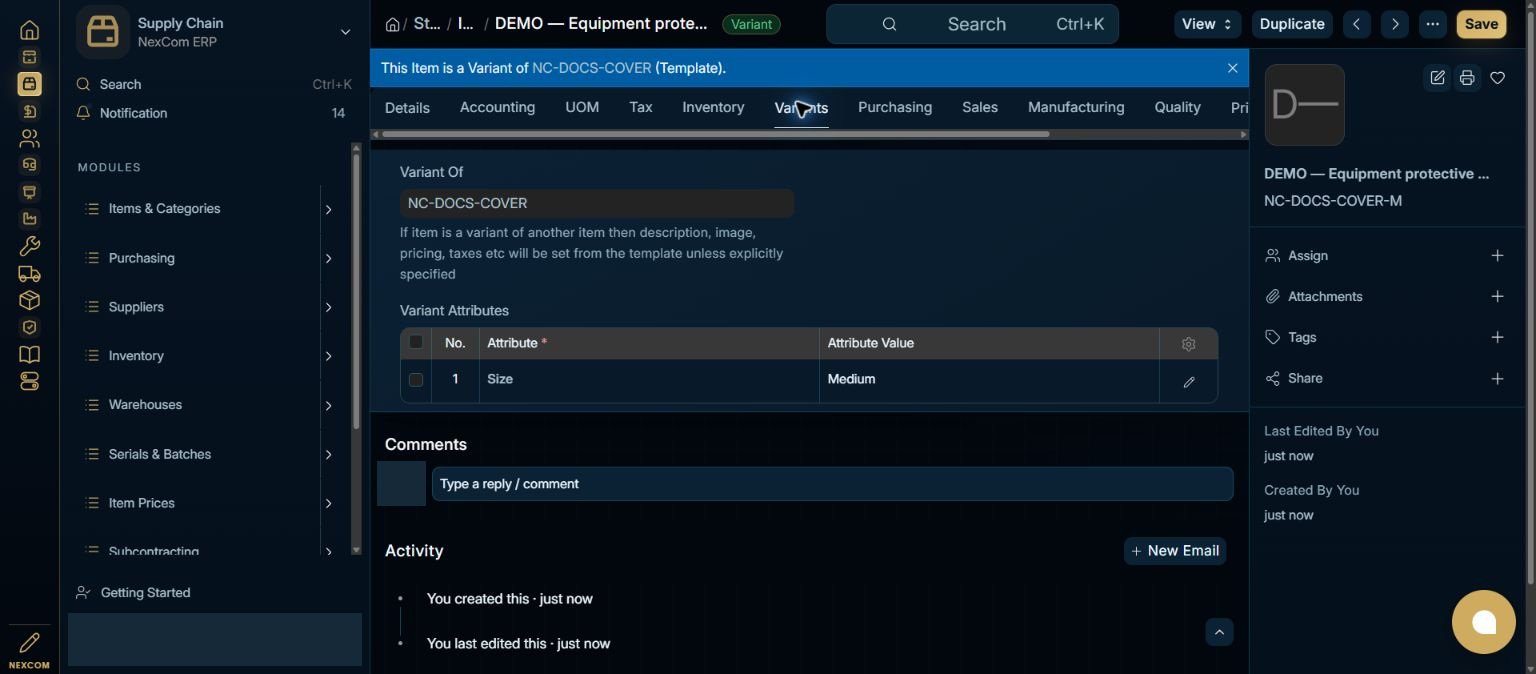
Verified result
The Size directory was reviewed. NC-DOCS-COVER was saved as a template, and NC-DOCS-COVER-M was created and saved through the UI with Size Medium. No inventory posting or shared attribute modification was made.
Troubleshooting
Wait for Link search results and choose the exact record. Leave each edited field to commit its value. Check required dates in every item row. A saved draft and a submitted record are different states. If validation fails, correct the highlighted field and verify the saved result before continuing.