
Use Customization: navigation and daily work
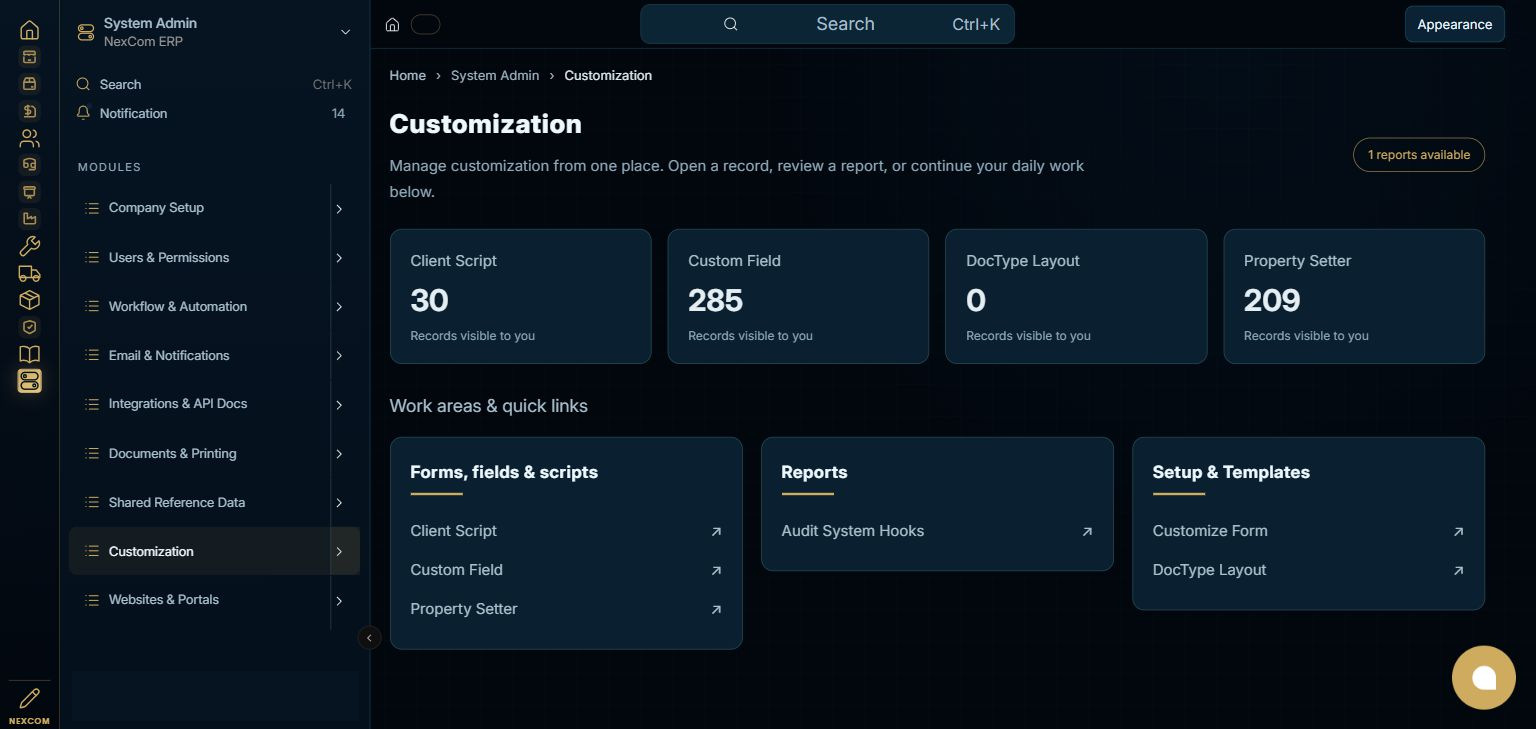
Open System Admin using the left app rail, then select Customization in its module menu. The module dashboard gathers the available records, reports and setup links.
Before you start
Use Customize Form and Custom Field for supported record extensions. Choose an appropriate field type, label, identifier and placement. Test required, unique and link behavior in staging, and check impact on reports, imports and APIs.
Find this module in the ERP
System Admin → Customization
Step-by-step instructions
Open the module
Open System Admin using the left app rail, then select Customization in its module menu. The module dashboard gathers the available records, reports and setup links.
{ERP_URL}/desk/nexcom-workflow/System%20Admin/CustomizationRecord forms may append /{RECORD_ID}; a new draft may use /new-{TYPE}-{TEMP_ID}. Query filters and selected tabs may add a query string or #fragment.
Continue the task
Choose the work area for your task. This staging dashboard provides Client Script, Custom Field, DocType Layout, Property Setter, Customize Form. Use an existing record for a change; use Add/New only when a new record is needed and your role permits it.
{ERP_URL}/desk/nexcom-workflow/System%20Admin/CustomizationRecord forms may append /{RECORD_ID}; a new draft may use /new-{TYPE}-{TEMP_ID}. Query filters and selected tabs may add a query string or #fragment.
Continue the task
Before saving or taking a workflow action, verify the relevant party, company, dates, source links and permissions. Use the field reference linked below for the selected record type. This navigation tutorial does not submit a business transaction.
{ERP_URL}/desk/nexcom-workflow/System%20Admin/CustomizationRecord forms may append /{RECORD_ID}; a new draft may use /new-{TYPE}-{TEMP_ID}. Query filters and selected tabs may add a query string or #fragment.
Continue the task
For review, open Audit System Hooks. Check the report filters, company and date range before interpreting the results. A record count on the dashboard is not a financial total.
{ERP_URL}/desk/nexcom-workflow/System%20Admin/CustomizationRecord forms may append /{RECORD_ID}; a new draft may use /new-{TYPE}-{TEMP_ID}. Query filters and selected tabs may add a query string or #fragment.
Choose the relevant work area
Check the result
Check the selected record, company, source relationships, field values and available actions. A successful save, approval, submission, external notification and payment are separate events. The module screenshot is a navigation reference; it is not evidence that the business transaction described in this article was executed.
Troubleshooting
Use the installed work areas and the linked task tutorials below. Available actions and records depend on your role; external services may require their own permitted sign-in.