
Use Navigation Setup: navigation and daily work
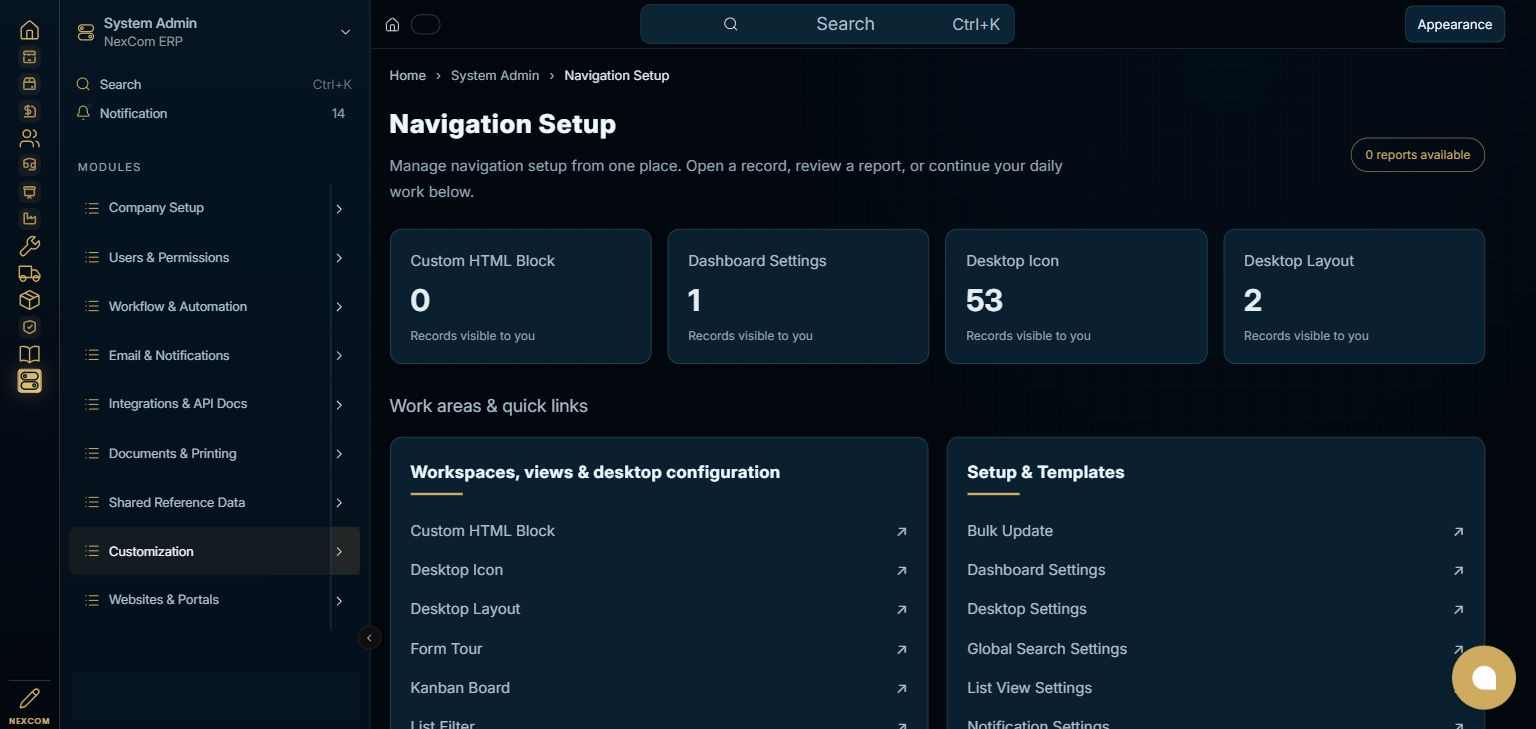
Open System Admin using the left app rail, then select Navigation Setup in its module menu. The module dashboard gathers the available records, reports and setup links.
Before you start
Keep the 14-app structure and module landing dashboards aligned with permitted ERP routes. Search and direct links complement the menu. Do not expose a route solely to avoid fixing an underlying permission issue.
Find this module in the ERP
System Admin → Navigation Setup
Step-by-step instructions
Open the module
Open System Admin using the left app rail, then select Navigation Setup in its module menu. The module dashboard gathers the available records, reports and setup links.
{ERP_URL}/desk/nexcom-workflow/System%20Admin/Navigation%20SetupRecord forms may append /{RECORD_ID}; a new draft may use /new-{TYPE}-{TEMP_ID}. Query filters and selected tabs may add a query string or #fragment.
Continue the task
Choose the work area for your task. This staging dashboard provides Custom HTML Block, Dashboard Settings, Desktop Icon, Desktop Layout, Form Tour, Kanban Board, List Filter, Module Onboarding. Use an existing record for a change; use Add/New only when a new record is needed and your role permits it.
{ERP_URL}/desk/nexcom-workflow/System%20Admin/Navigation%20SetupRecord forms may append /{RECORD_ID}; a new draft may use /new-{TYPE}-{TEMP_ID}. Query filters and selected tabs may add a query string or #fragment.
Continue the task
Before saving or taking a workflow action, verify the relevant party, company, dates, source links and permissions. Use the field reference linked below for the selected record type. This navigation tutorial does not submit a business transaction.
{ERP_URL}/desk/nexcom-workflow/System%20Admin/Navigation%20SetupRecord forms may append /{RECORD_ID}; a new draft may use /new-{TYPE}-{TEMP_ID}. Query filters and selected tabs may add a query string or #fragment.
Continue the task
Return to the module dashboard to choose the next related work area. If a link is unavailable, check the assigned role and configured service access with your administrator.
{ERP_URL}/desk/nexcom-workflow/System%20Admin/Navigation%20SetupRecord forms may append /{RECORD_ID}; a new draft may use /new-{TYPE}-{TEMP_ID}. Query filters and selected tabs may add a query string or #fragment.
Choose the relevant work area
- Custom HTML Block
- Dashboard Settings
- Desktop Icon
- Desktop Layout
- Form Tour
- Kanban Board
- List Filter
- Module Onboarding
- Onboarding Step
- Route History
- Setup Wizard
- Sidebar Item Group
- Tag
- Tag Link
- Workspace
- Workspace Sidebar
- Bulk Update
- Desktop Settings
- Global Search Settings
- List View Settings
- Notification Settings
- Notification Type
Check the result
Check the selected record, company, source relationships, field values and available actions. A successful save, approval, submission, external notification and payment are separate events. The module screenshot is a navigation reference; it is not evidence that the business transaction described in this article was executed.
Troubleshooting
Use the installed work areas and the linked task tutorials below. Available actions and records depend on your role; external services may require their own permitted sign-in.